Altoids tin Arduino GPS "return to origin" project, thanks to Perl
Warning! Long read...
This post contains an Arduino Trinket Pro GPS prototype project that only relates to Perl in that all of my knowledge and experience came from my Raspberry Pi Perl work, along with writing C/XS code for several ICs and sensors and making those available as Perl APIs. I'm posting it here due to that relevancy, and because I don't blog anywhere else ;)
To start off, I'll explain a little bit how I got to this path.
I became interested in the Raspberry Pi after a colleague showed me a project he had built with one. I went out, bought a couple and started tinkering. The very first thing I wanted to do was use Perl on it. There were a couple of libraries available, but they seemed convoluted to me, so I wrote my own.
I started by wrapping wiringPi in XS. Some of the functions needed wrappers, as they wouldn't natively work in Perl (interrupts being a big one). This software I deemed WiringPi::API. It contains nearly all of the functionality of the wrapped library.
Quickly I noticed that if a program crashed, the GPIO would be left in an inconsistent state, so I wrote RPi::WiringPi. It manages signals and other things to ensure the GPIO and board itself is reset to a sane state before exiting a crashed program. It essentially wraps the API. It also allows you to easily pull in a reasonable assortment of ICs, sensors and peripherals that are external to this module (ADCs, DACs, digital potentiometers, shift registers, environment sensors, distance sensors etc).
After I wrote the base RPi::WiringPi, I needed to be able to access peripherals and the like, so I started learning about how to go about this. I bought my first Analog to Digital converter (ADC) (an ADS1115), and read through the datasheet. Wow, a lot of info! I quickly realized I needed to master hardware registers, and more importantly bit manipulation. To do so, in C/XS, I wrote Bit::Manip. I wrote that module solely for education purposes.
After I had all of that down, I started writing code for several ICs and sensors, such as:
- ADS1115 ADC
- MCP3008 ADC
- BMP-180 barometric pressure sensor
- MCP4922 DAC
- HC-SR04 sonic distance sensor
- 16x2/20x4 char LCD
...amongst others. After all of that, I had some of the C basics down, so I started toying with an Arduino Uno I had laying around for some time. I'll skip all that, but I quickly liked the idea of the tiny Trinket Pro, so bought a couple, then decided my first real project I'd prototype would be the GPS return to origin device. And that's where we are now...
I hike an awful lot way out in the Canadian mountain ranges, and thought I'd use my new skills to create a device that would allow me to save my current (starting point) coordinates, and then if I ever get lost, turn the device back on and direct me back to my origin.
For the packaging of this initial prototype, I was inspired to use an Altoids tin, by this project.
The whole thing as it sits weighs 4.4oz, and in initial testing, the device runs for just over 24 hours straight on a single charge (it's designed to be turned off after saving initial coors though, until you need to return back).
The device breakdown is as follows (all prices CDN):
- 18650 Li-ion battery 5v @ 800mA, 1200mAh with charge controller. I got these battery packs from the Dollar Store and tore one apart to fit in the Altoids tin ($4)
- Seeed Grove GPS unit ($45)
- 128x32 OLED screen ($4)
- Arduino Trinket Pro ($8)
- pre-built PCB ($0.88)
- 24ga solid core wire (~$0.05, based on the amount taken from a spool)
- two tactile buttons ($0.04 each)
- two slide switches ($0.45 each)
- roll of rubber tape for insulation inside the tin ($2)
- tin of Altoids ($1.45)
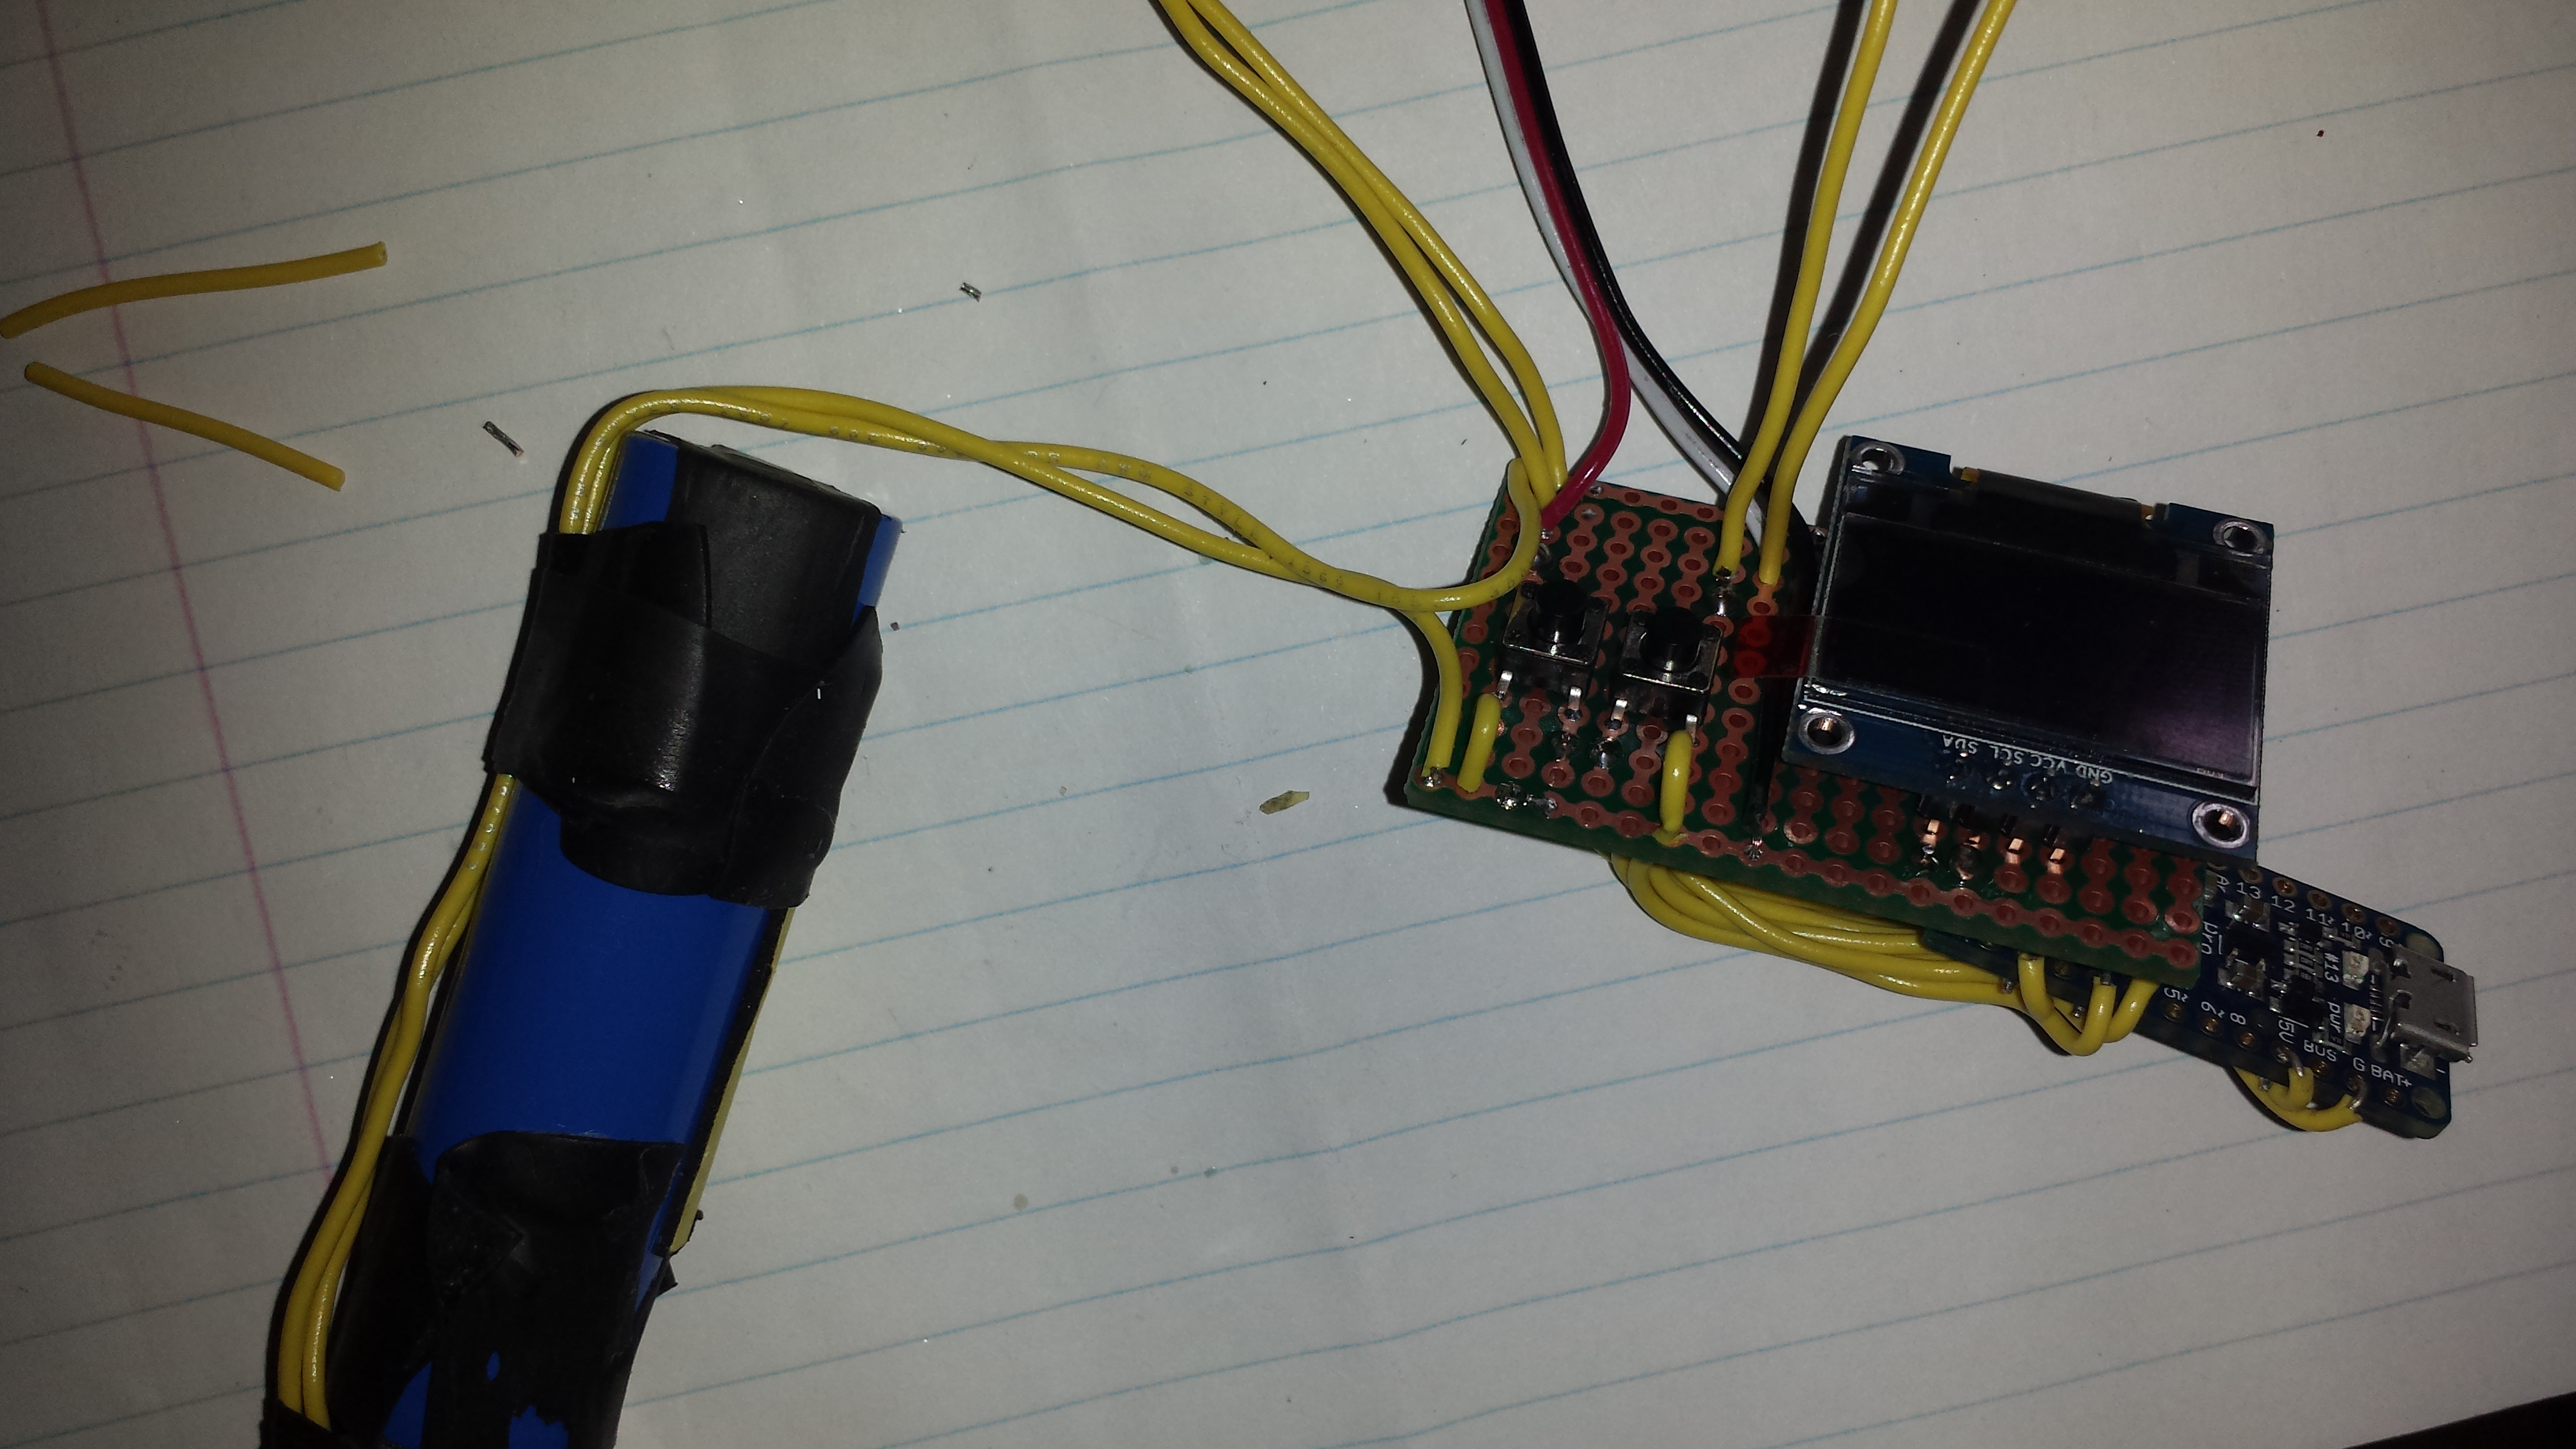
Here's the battery attached to the main board:
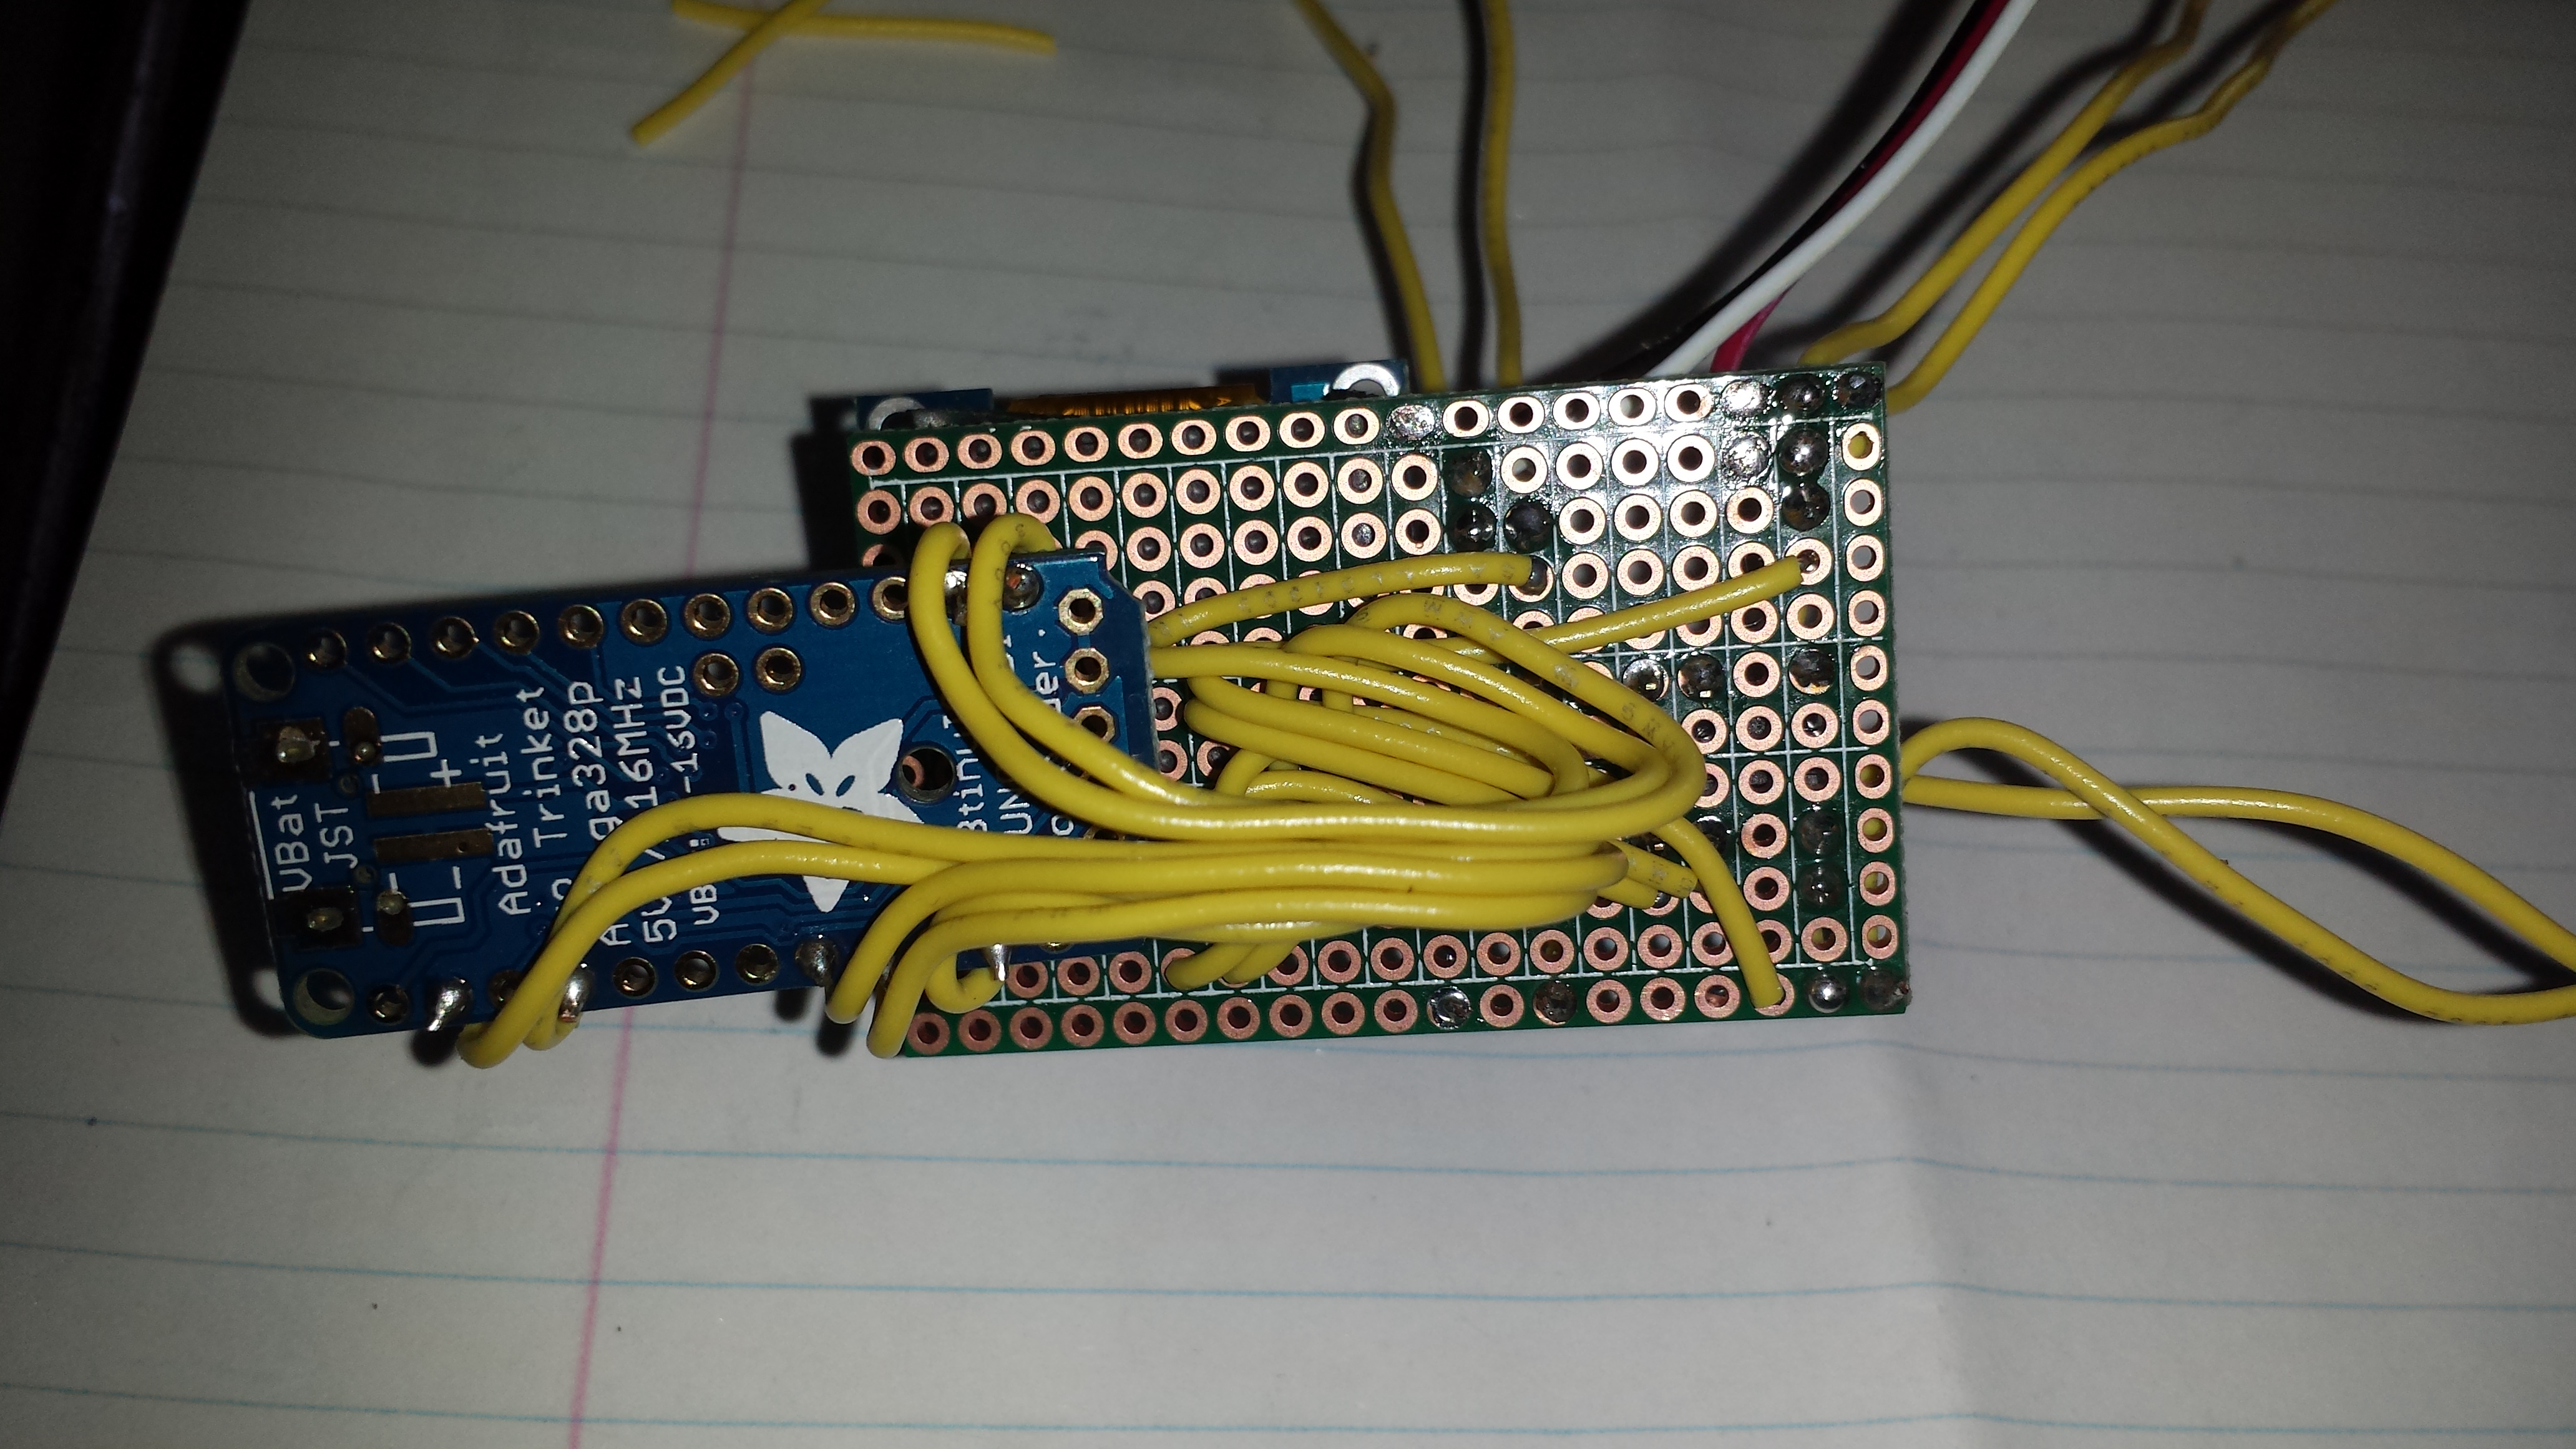
All of the Arduino Trinket Pro connections were done through the bottom and soldered on the top of the main board:
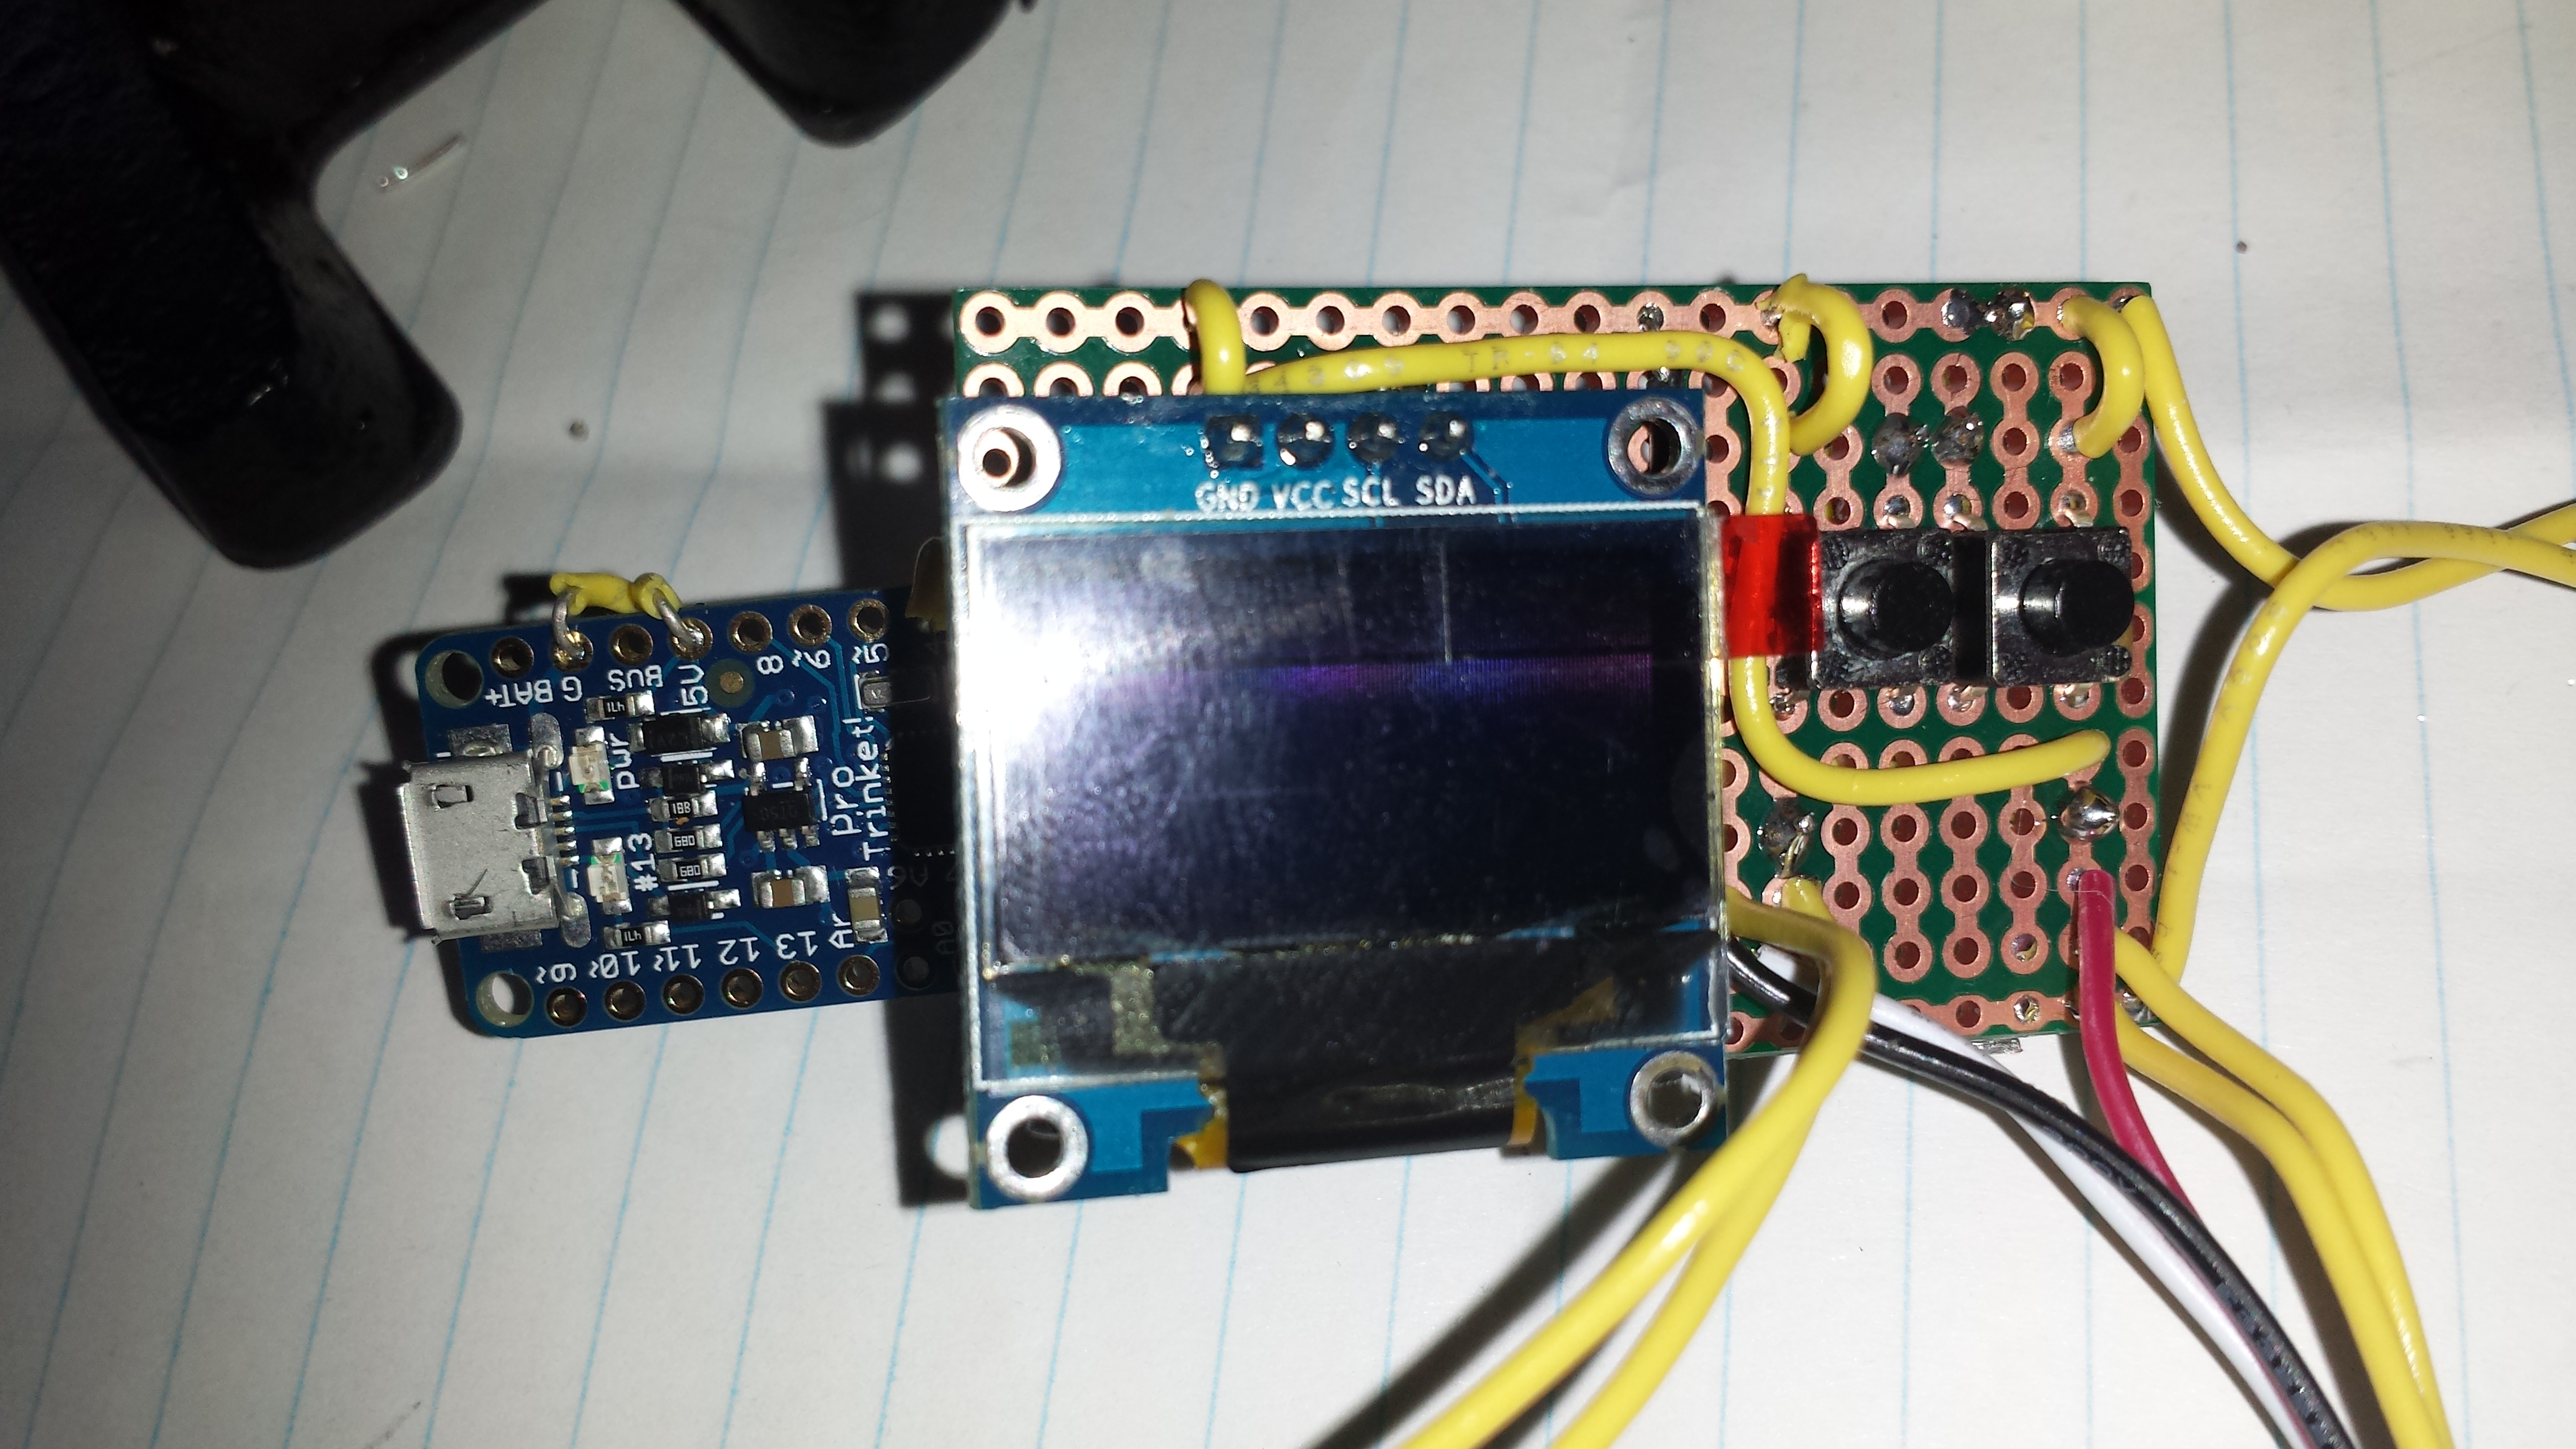
Pretty much all of the main board connections soldered:
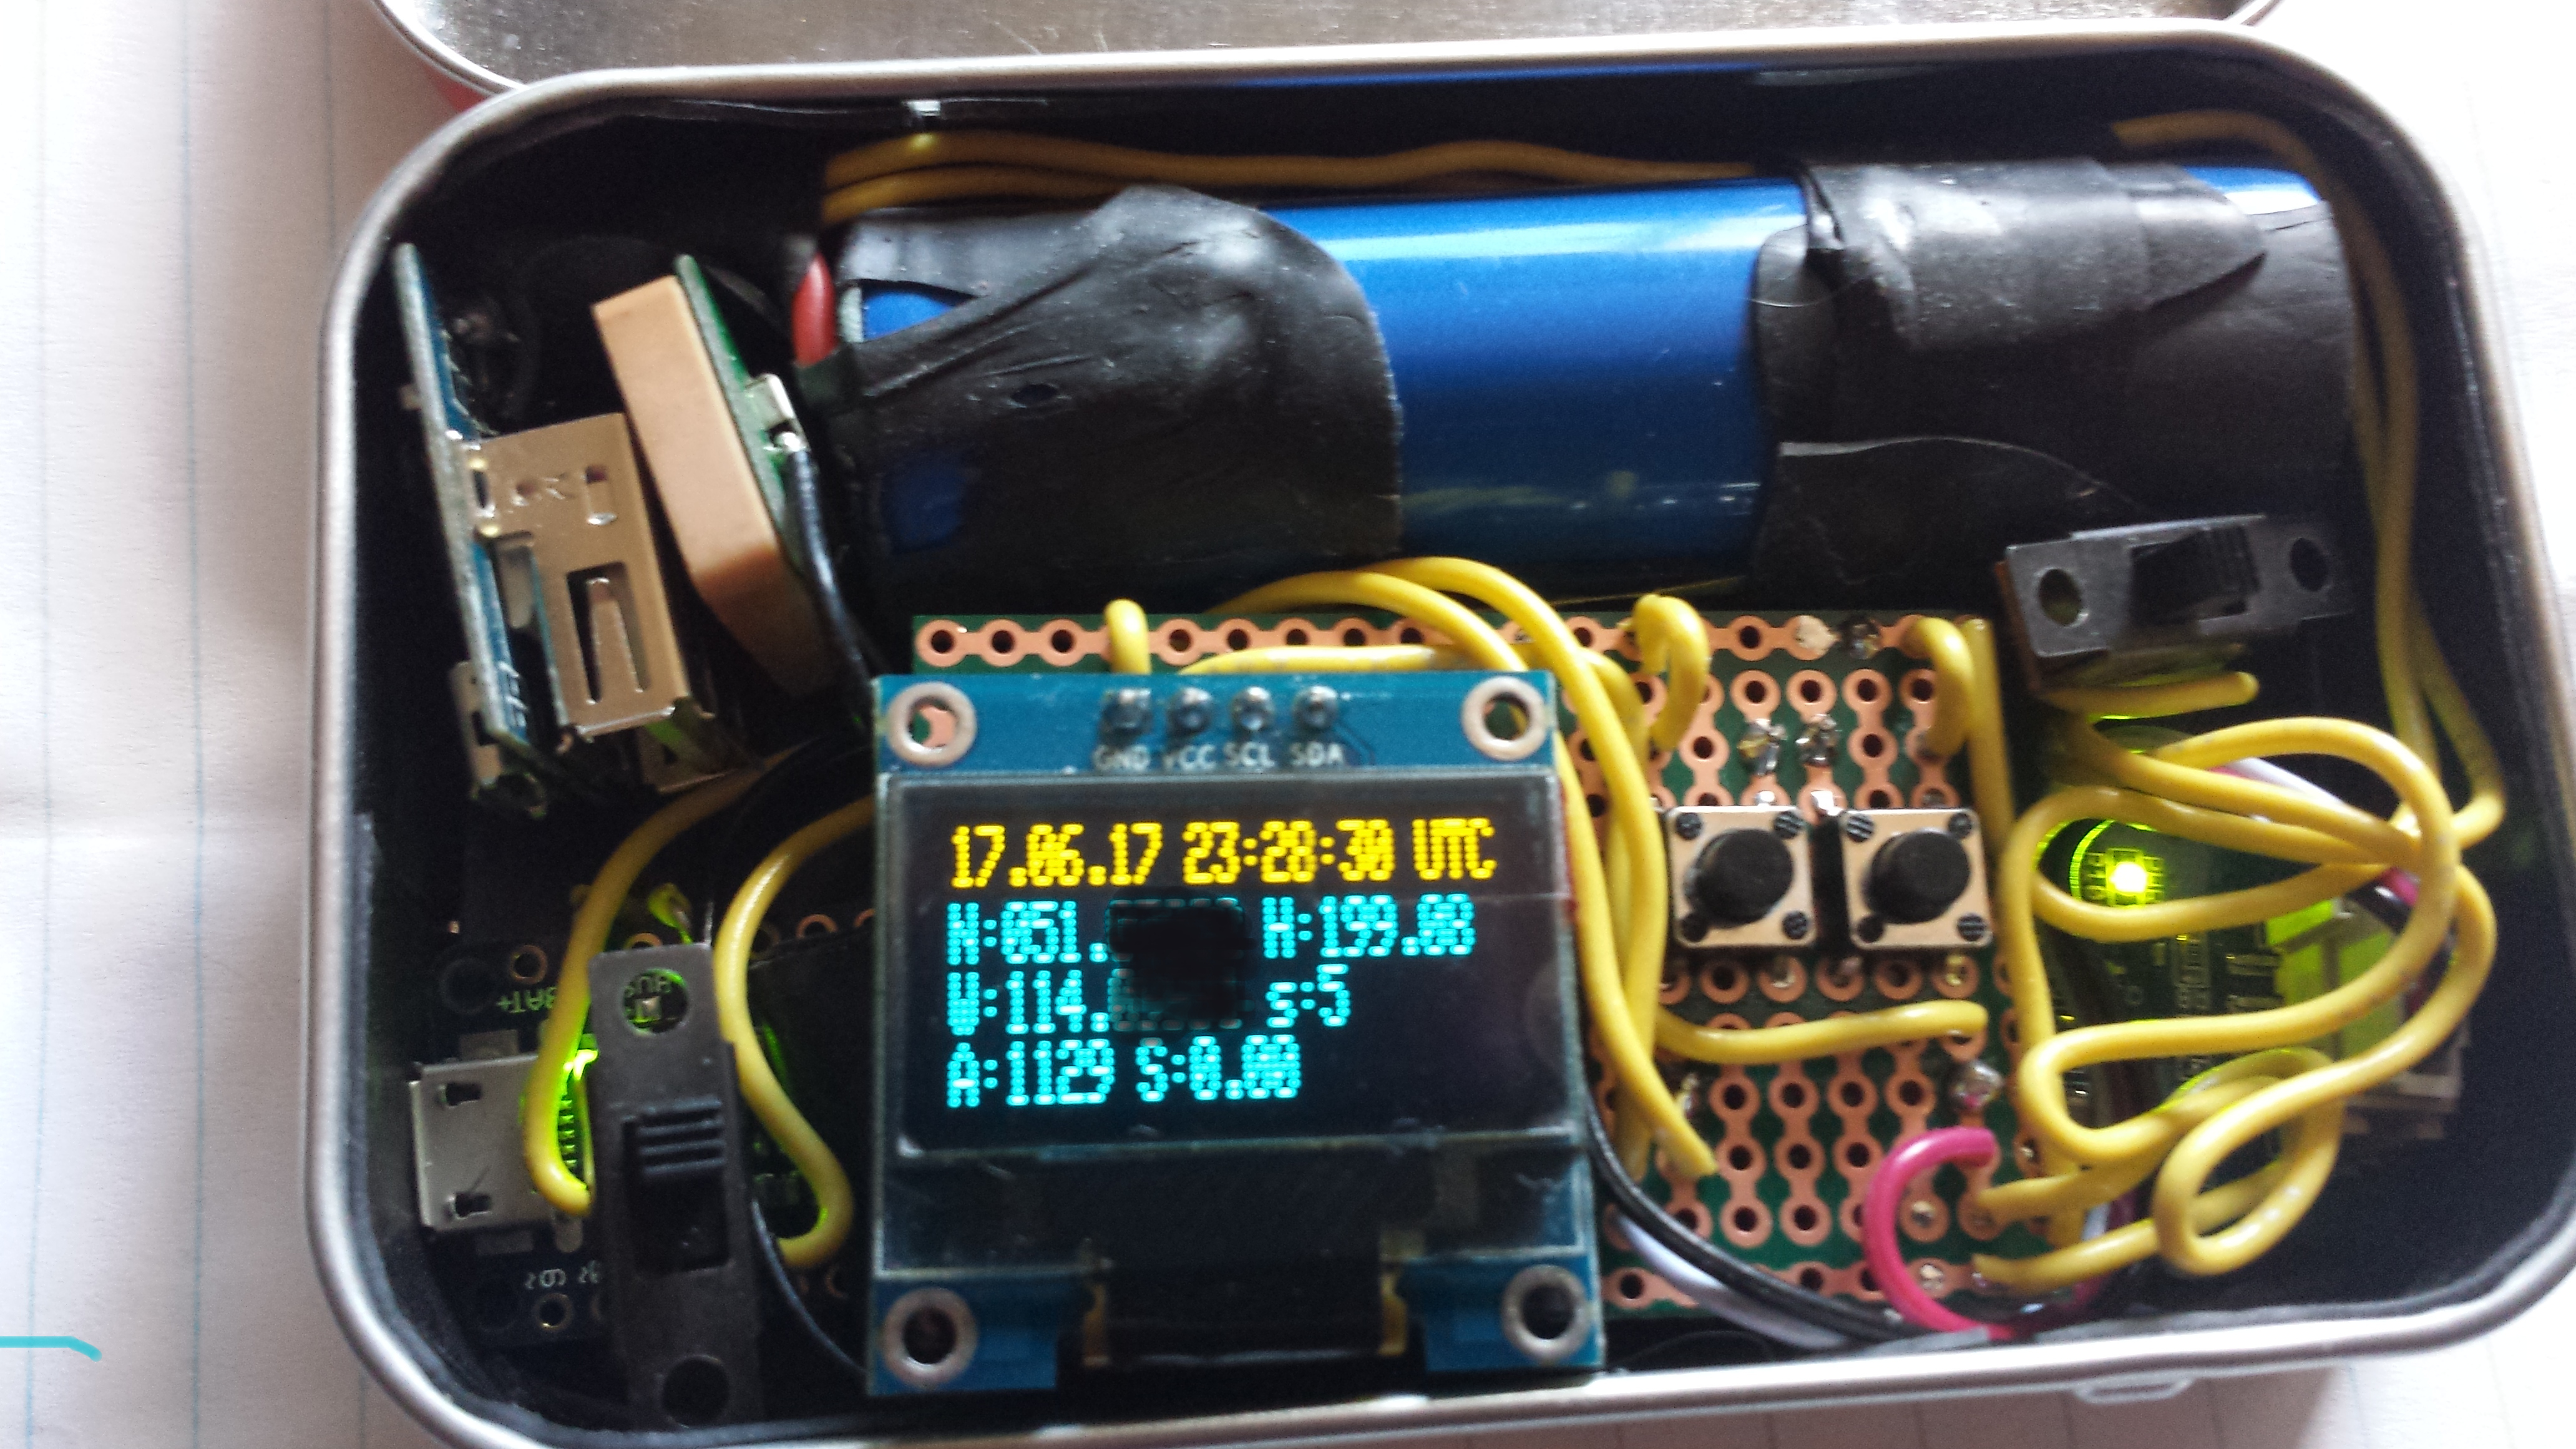
Ok, here's everything in the Altoids tin. I used rubber tape around the inside as to not cause any shorts, and it helps things stick better. Top left is the charging regulator connected to the battery. It can safely be charged while being used. To boot, there's an extra USB port if you wanted to charge your phone with the battery.
Next to it, the beige item is the GPS antenna, followed by the battery. Below the USB charging port is the "programming" switch. This allows you to detach the serial interface from the GPS, connect a USB cable to the Trinket Pro (underneath of the switch) and upload new software. Underneath the mainboard and beside the Trinket is the GPS board. The switch at the far right is the main power on/off. At the top under the battery is the main board housing all of the connections and the OLED 128x32 screen.
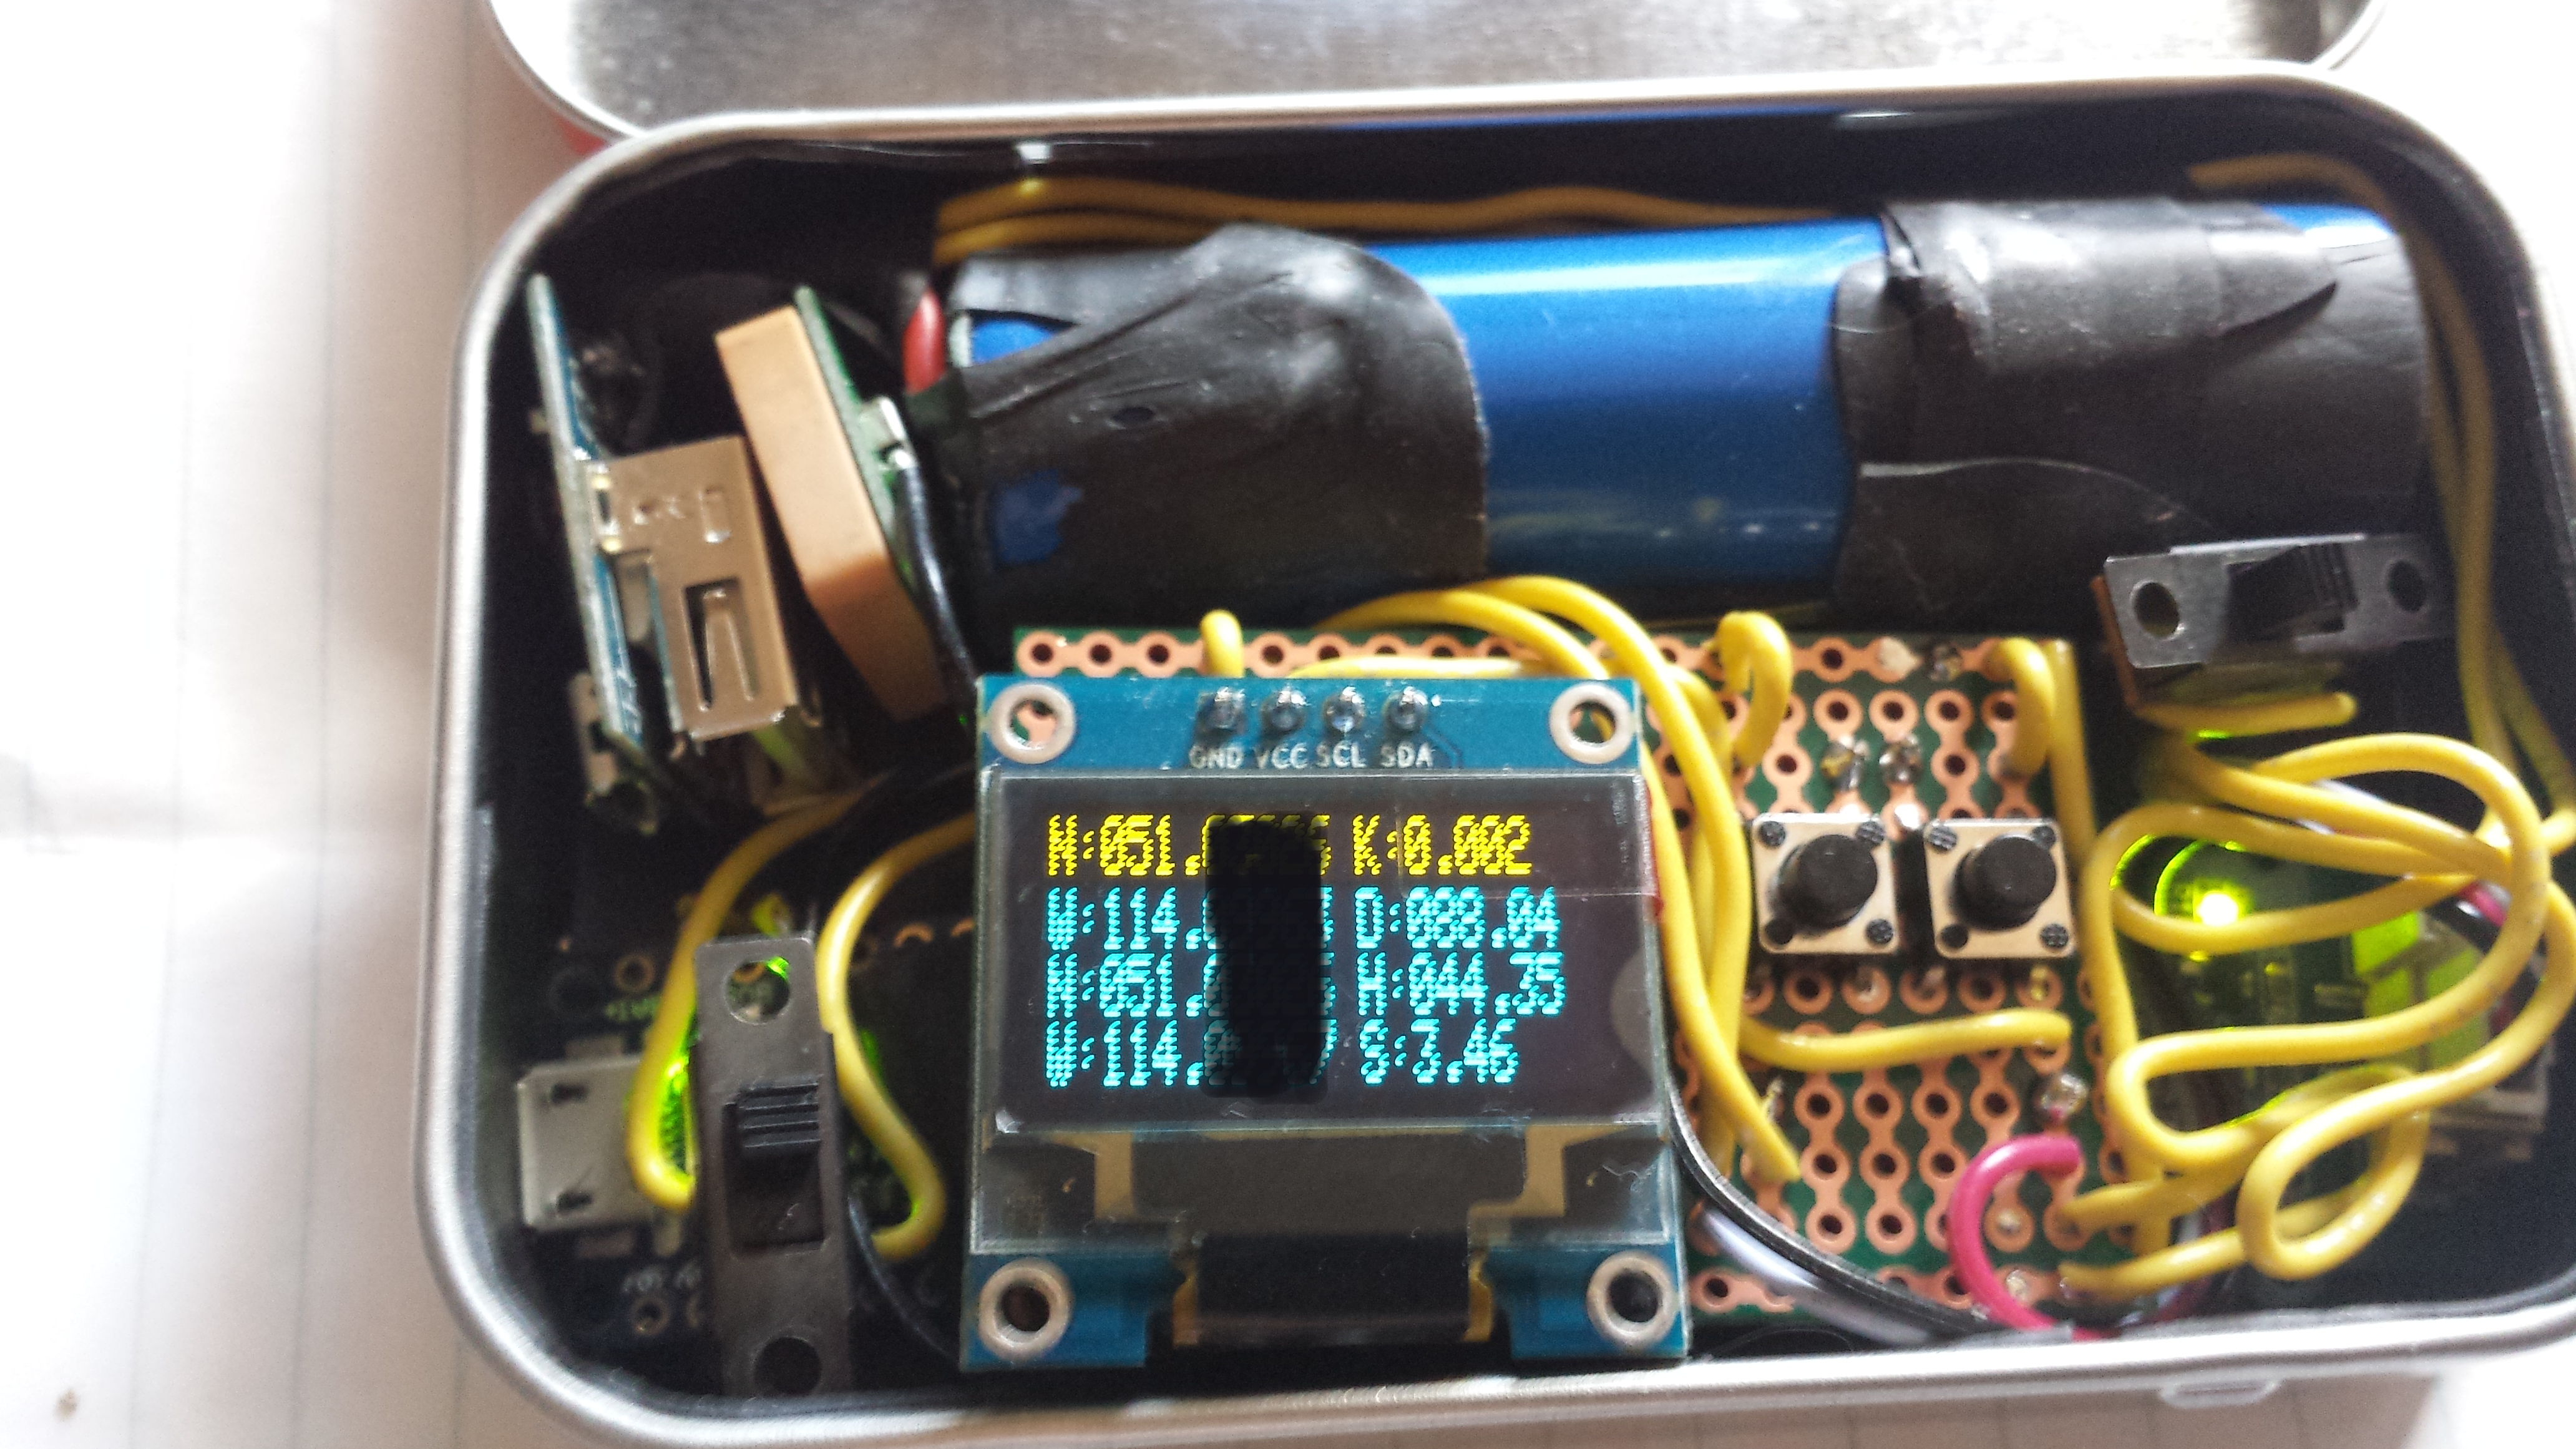
On the board are two buttons. The left one toggles between screen modes. Currently there are two. The one shown is the main, or home screen showing the current time in UTC, your current North and East location, your current heading (H), number of satellites locked onto (s), current altitude in metres (A) and your current speed in Km/h (S). The right button allows you to save your current coordinates to EEPROM. This is what allows you to know how to get back to your original location (that's shown on the "Return screen, in a later pic). To operate this feature, you click the button once, it'll ask if you want to save coords. You then click and hold the button for two seconds, and they will be saved. If you do not hold the button long enough, the save will be aborted.
Note that I chop the lat/lon to five decimal places (which are obscured). This is approximately ~1 metre accuracy. We save some screen area by shaving further digits as we don't need centimetre or millimetre precision.
Here's the "Return" screen mode. After saving a set of coordinates, this screen will provide live information on getting back to your saved location. Top row: destination north heading, followed by the number of kilometers to the destination (to metre accuracy). Second line, destination east location, followed by the direction needed to travel if you were to go in a straight line. Line 3, Current north location and current heading and line four, current east location along with your current speed in Km/h.
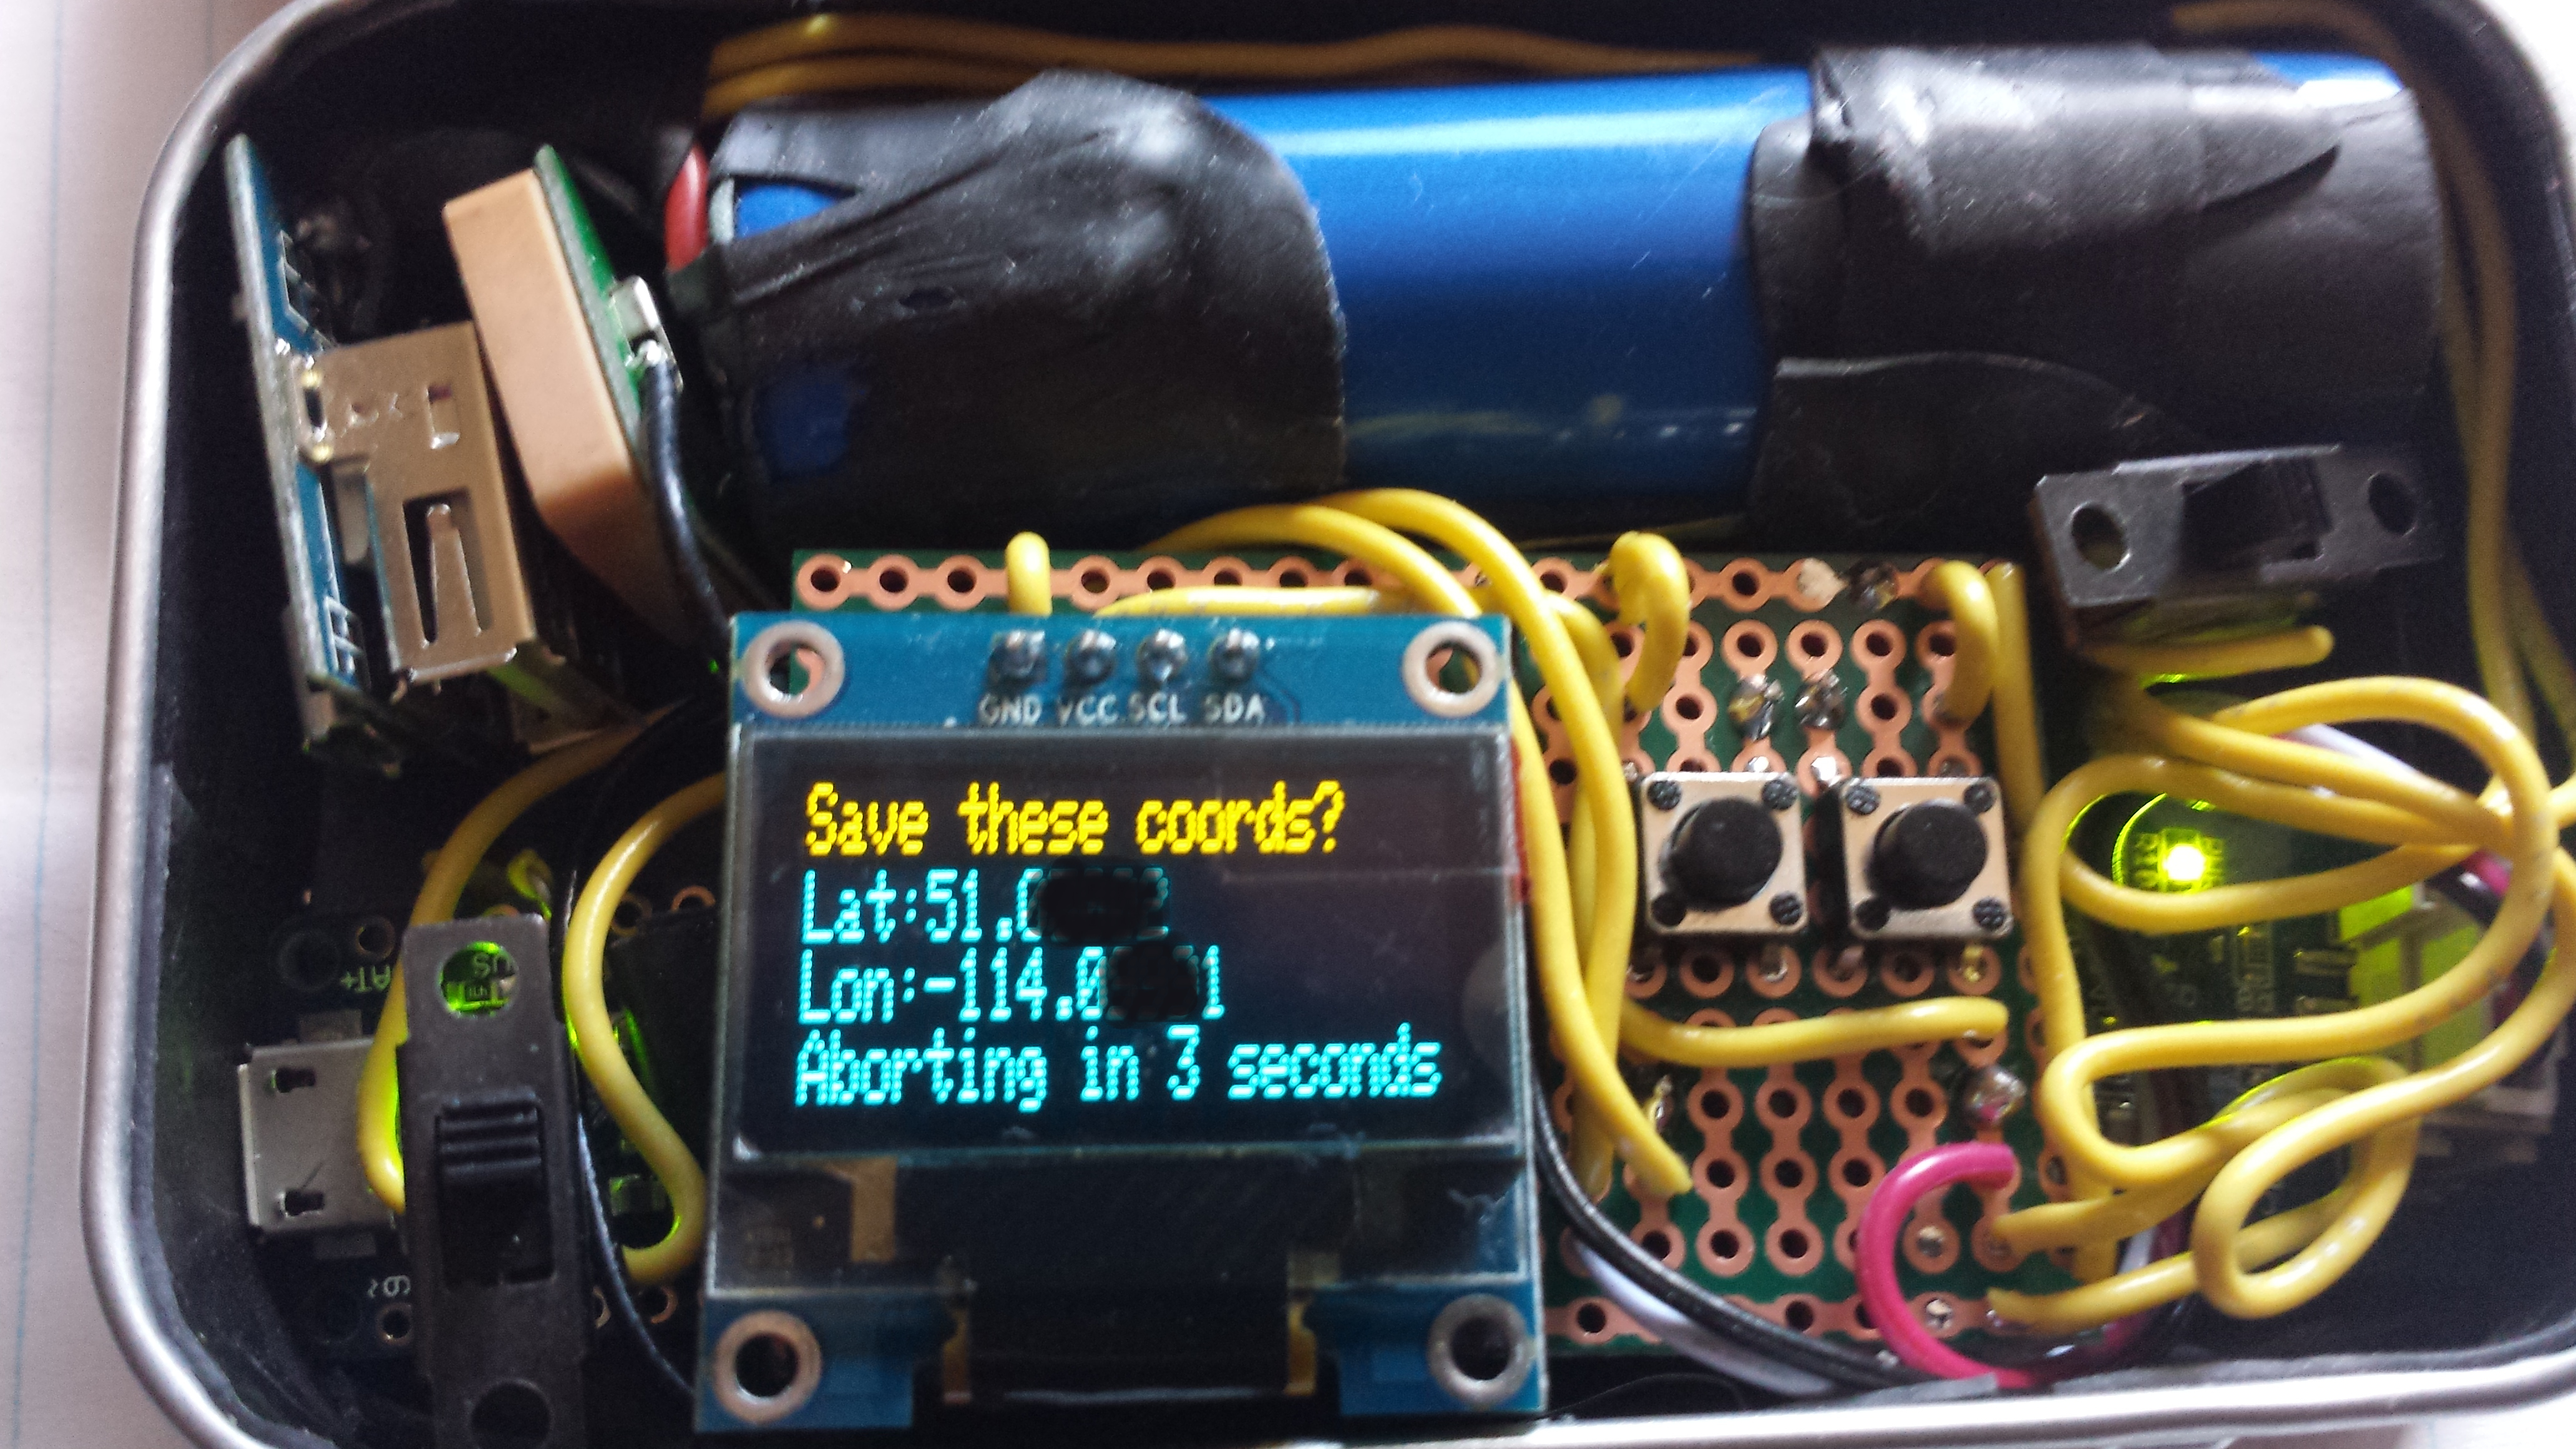
Here's the "save current coordinates" screen, activated with the right button. Click once to bring up the option to save the coordinates of your current location to EEPROM for use with the return functionality. After entering this screen, you have five seconds to act or else the process will be aborted. Press and hold the button for at least two seconds and the coords will be saved.
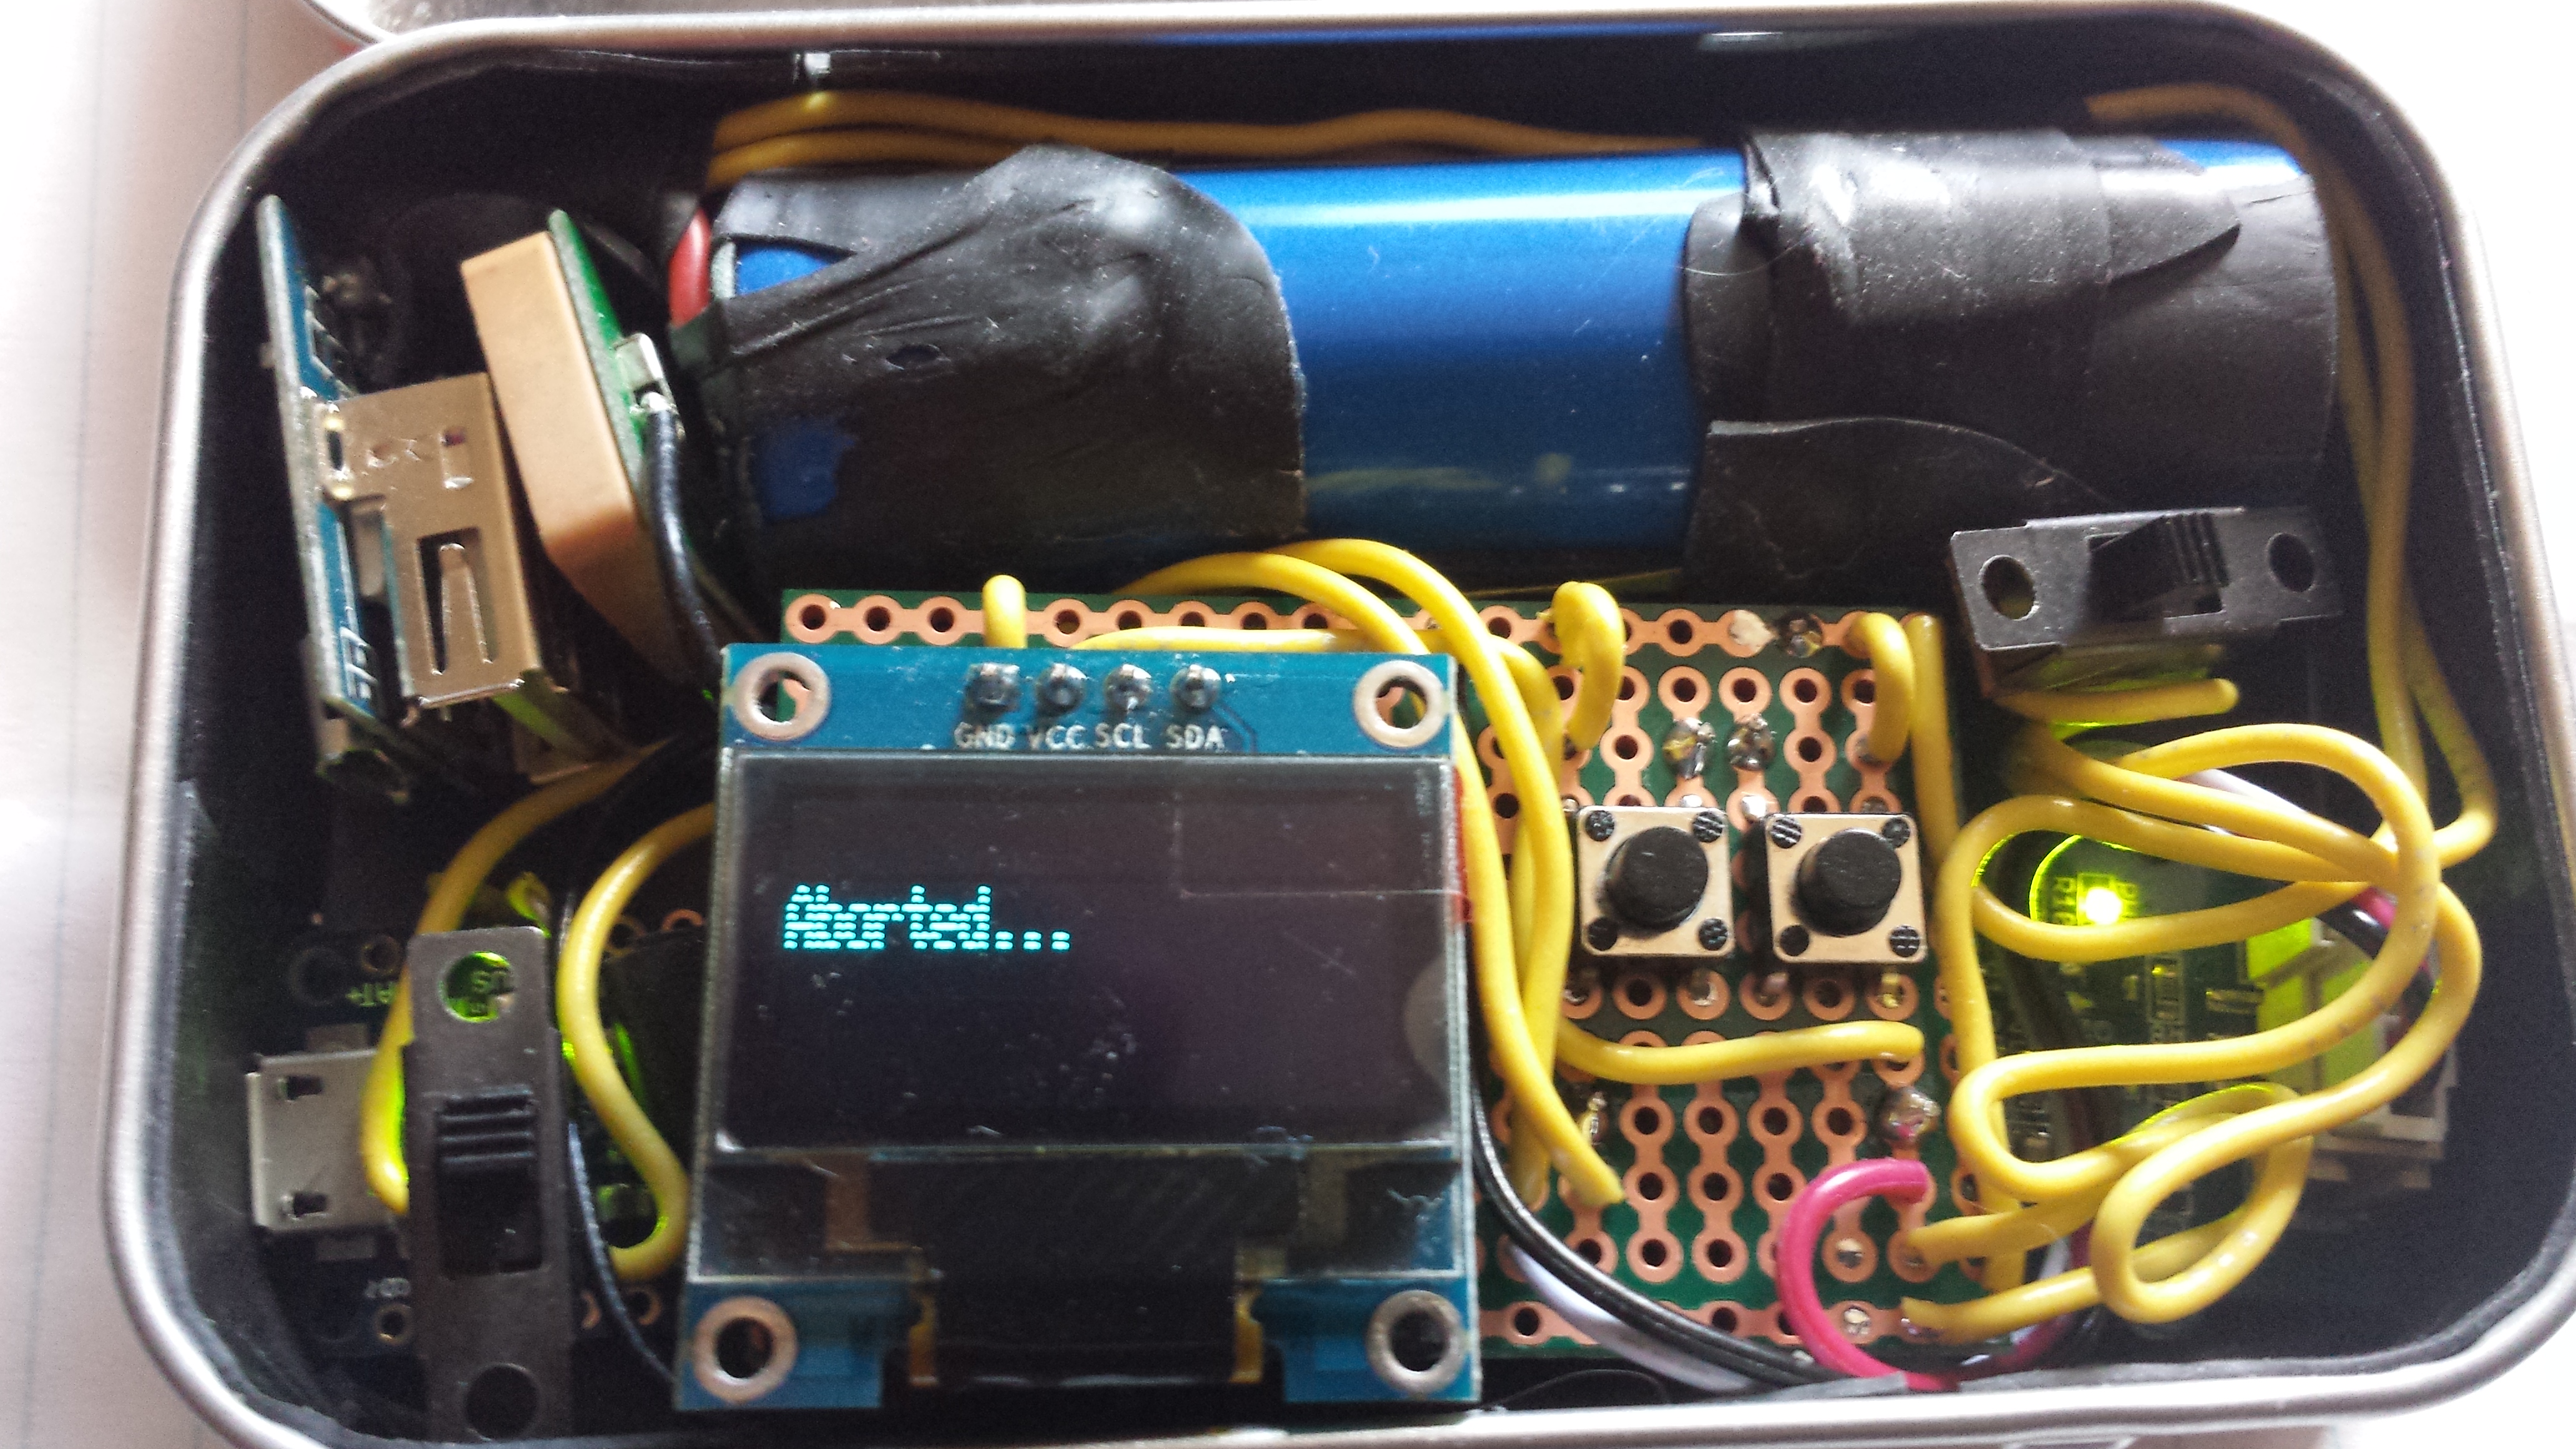
Save coords aborted:
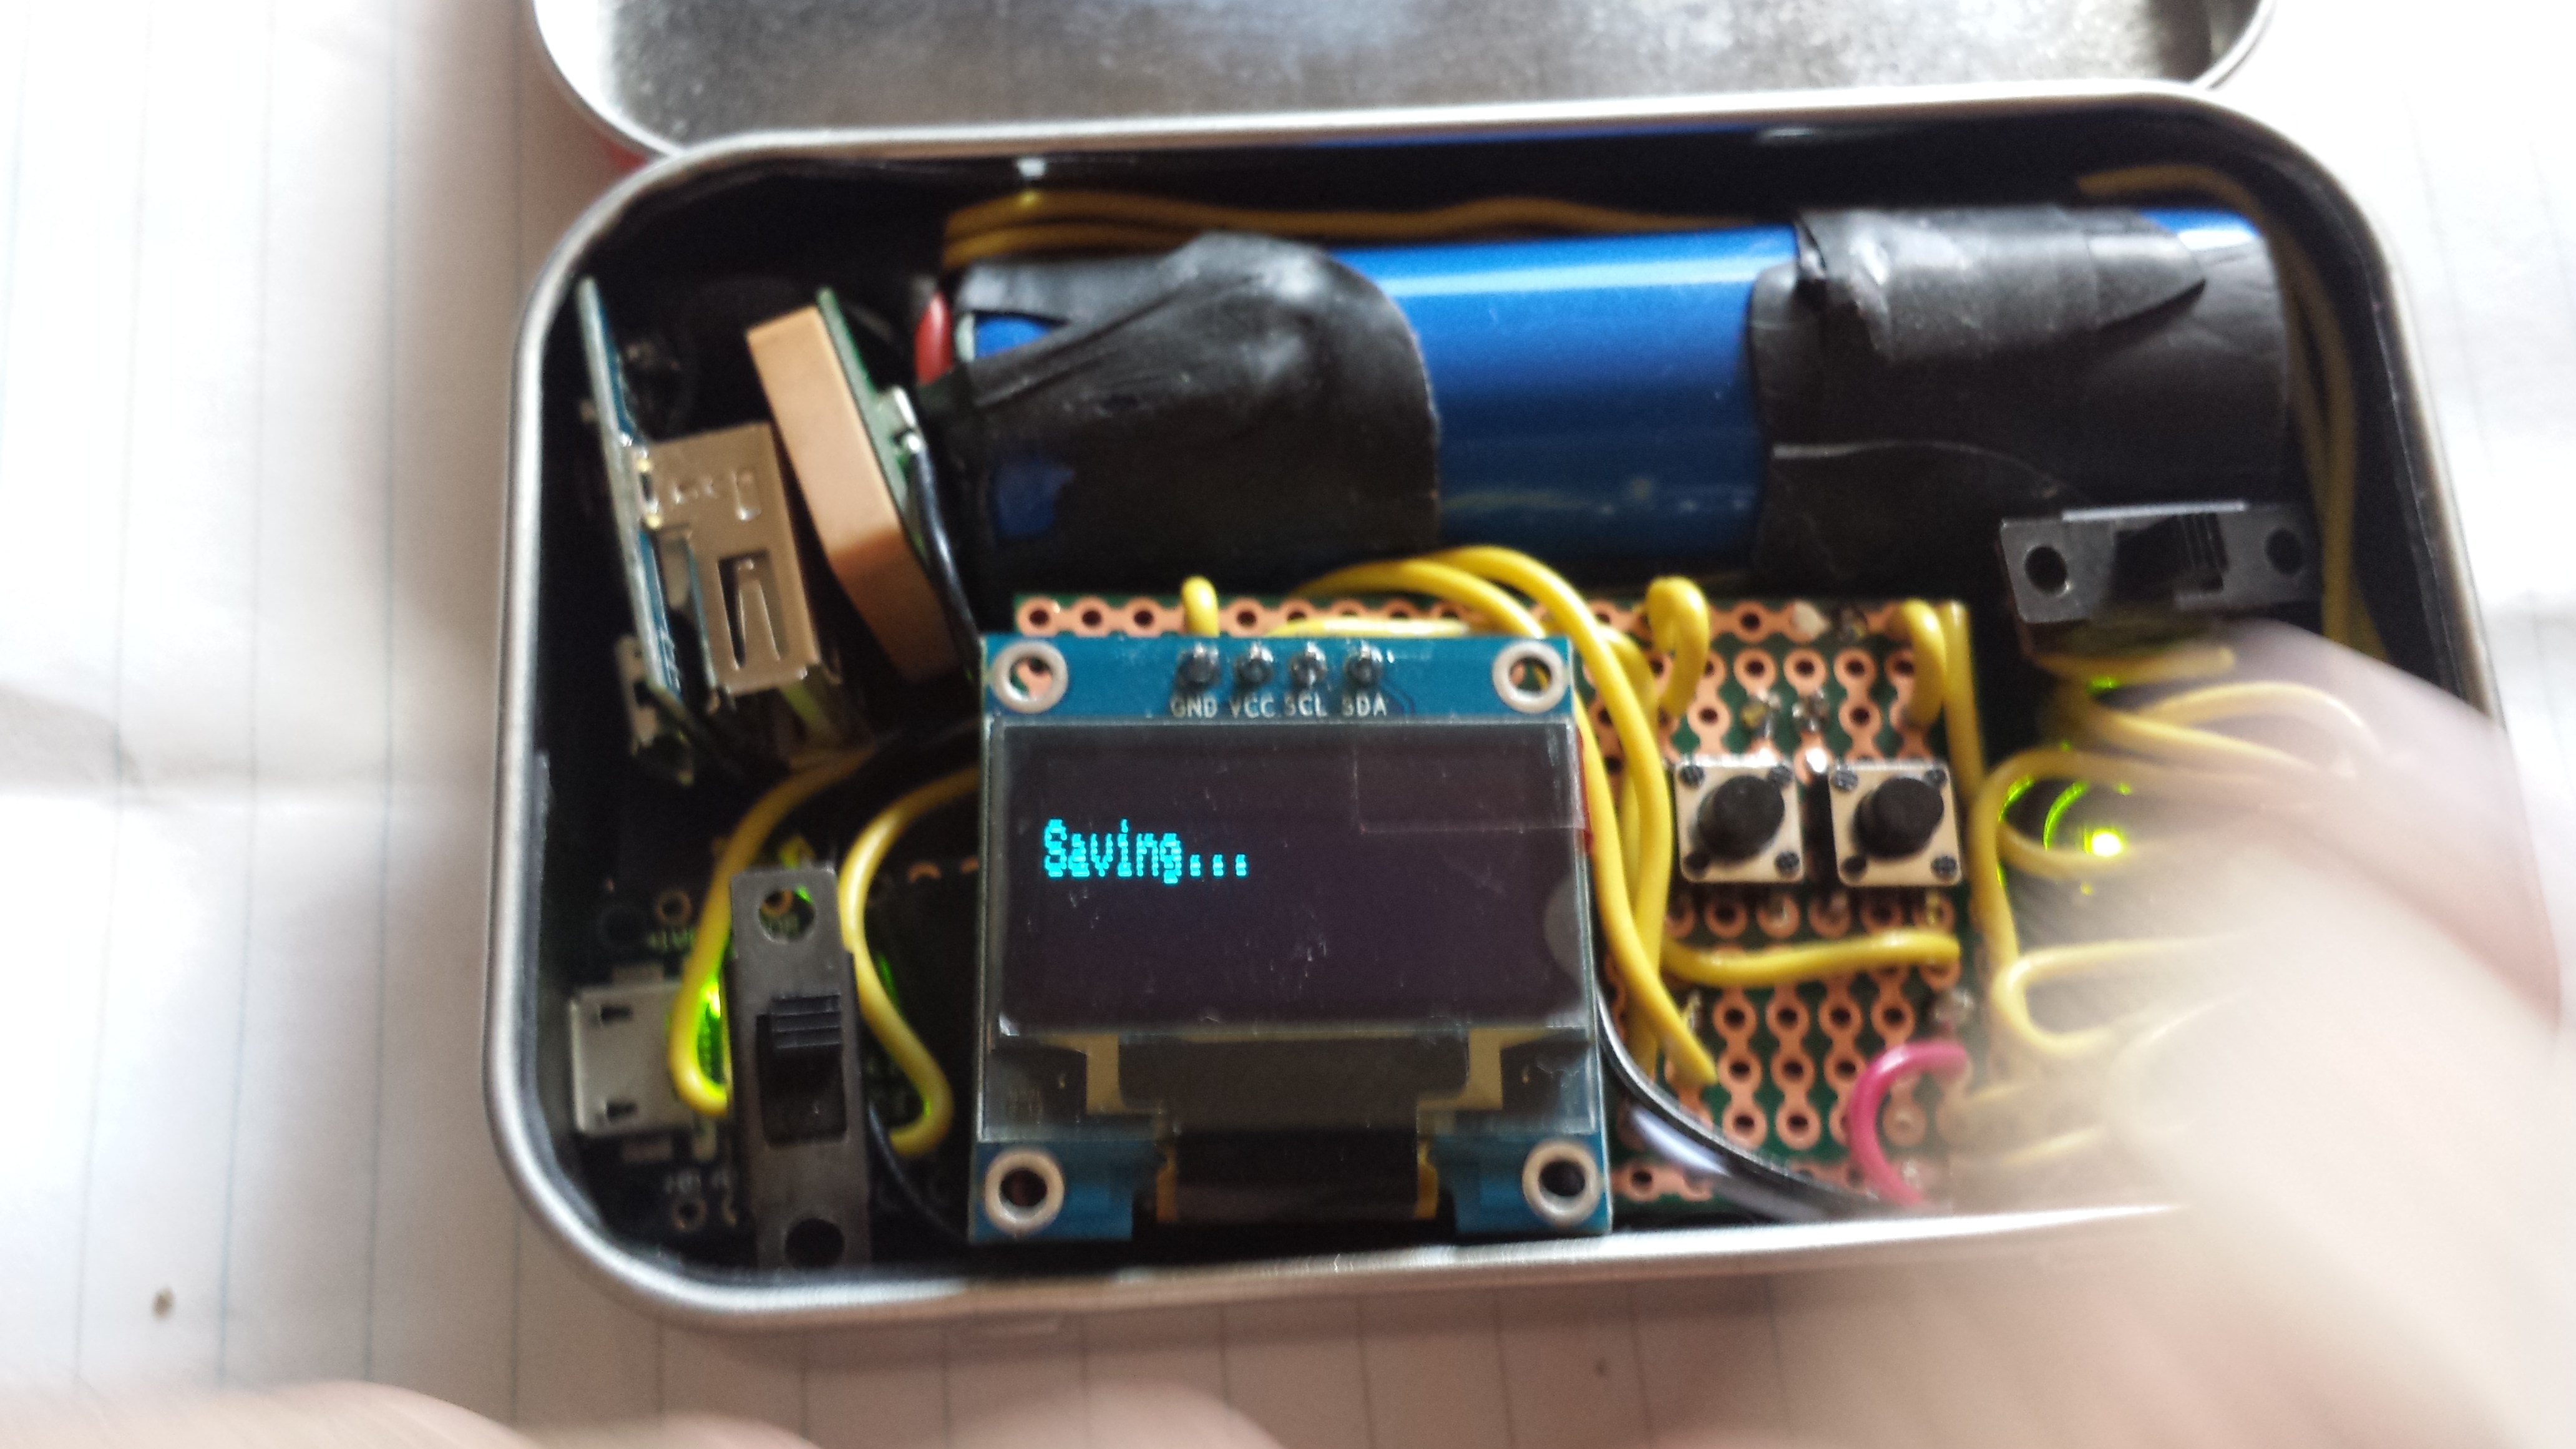
Save coords actioned upon:
If we're not receiving anything from the GPS, we alert the user. This is caused by forgetting to change from programming mode (which cuts off the serial connection) to run mode:
On power on, as long as the GPS is connected, we inform the user that the GPS is available, but we're waiting until we lock onto enough satellites to be triangulated:
A quarter and lighter to get an idea of the size of everything:
With the lid closed:
Please note that I'm still pretty new to C, so the code has a lot to be desired, but it works exceptionally reliably as-is (suggestions welcome)!
Here's my initial hardware layout diagram.
All in all, it's taken me about a year of learning, testing, getting frustrated, despising datasheets with incorrect info and a whole lot of help and patience from others, particularly the kind folk over at Perlmonks who went way above Perl coding to help me understand many things I had a hard time wrapping my head around to get this far. The next version will have much tidier and tighter connections/wiring (which will be hidden, with ports and the screen accessible from outside of the tin.
 Just Another Perl Hacker
Love this project. I use perl almost exclusively on my pi and pine64 projects. I usually write my own bit-banged drivers for SPI IC's. I write my own drivers for I2C devices, but I use your RPi::I2C module. After getting frustrated trying to write my own DHT11 driver, I gave up and used yours at RPi::DHT11 and it works great. Just wanted to say thank you for sharing your work!