Masking Images with Imager
Sometimes you want to do something fancy with images in a completely automated way. So for example, maybe you want to turn the image on the left into the image on the right:
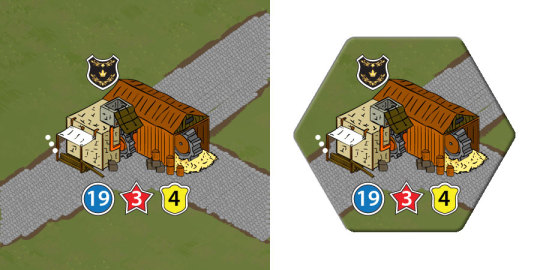
It turns out this is a pretty simple process using Imager.
Step 1 - Create a blank image.
use Imager;
my $tile = Imager->new(xsize => 450, ysize => 450, channels => 4);
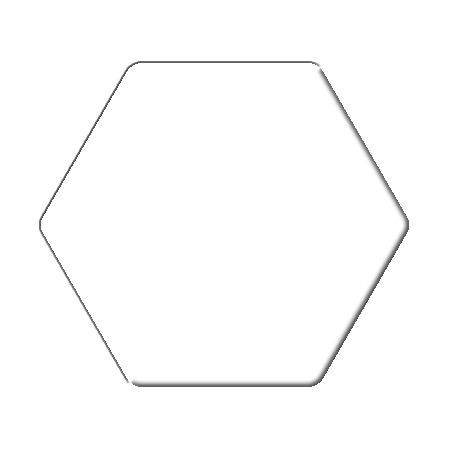
Step 2 - Create a mask. This is just a PNG file that is black where you want transparency, and white or transparent where you want things to show through. In my case I created this mask.

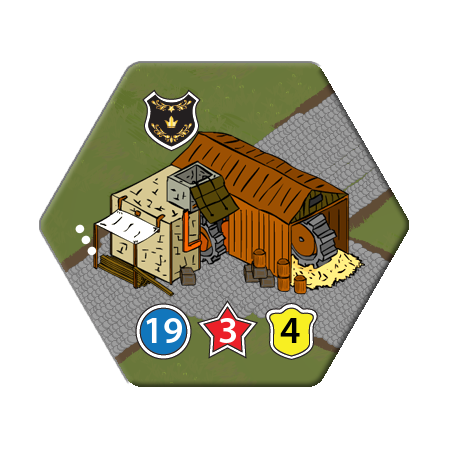
Step 3 - Use combine your mask with the image you want to mask.
my $mask = Imager->new(file => 'mask.png');
my $craftsman = Imager->new(file => ‘craftsman.png’);
$tile->compose(src => $craftsman, mask => $mask);
Step 4 - For extra flare, add a bevel.
my $bevel = Imager->new(file => ‘bevel.png’);
$tile->compose(src => $bevel, opacity => 0.8);
Note: Technically, the bevel is being created in some extra software like Photoshop or Gimp, and we’re just applying it here.
Step 5 - Save the file.
$tile->write(file => ‘tile.png’);
As you can see, it’s pretty easy to do some pretty cool effects in Imager. Enjoy.
[From my blog.]
 My little part in the greater Perl world.
I just wanted to say this is a very cool post. As an old hex-based board gamer that image is really cool. The Perl module GD::Simple won't install on my Mac so I was researching Imager. Thanks for providing this excellent example!
I'm glad you found it useful.