Importance of Repositories in Public

It used to be so that a repository was only a place of work and the distribution was the actual result of that work. Only the contents of the distribution mattered. People would read the files README and INSTALL from the distribution after having downloaded it.

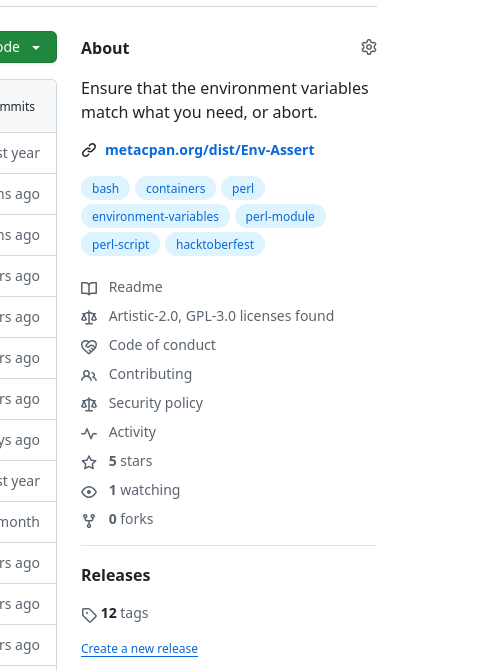
Not so anymore. Today the repository is out in the open in GitHub, GitLab, Codeberg or other shared hosting site. On the other hand, the documentation in the distribution is often discarded as distribution packages are rarely downloaded manually but rather via a package manager which installs them automatically.

Publicly viewable repository has in fact become much more than just a place of work. It is also an advertisement for the project and of the community behind it, if there is more than one author or contributor.

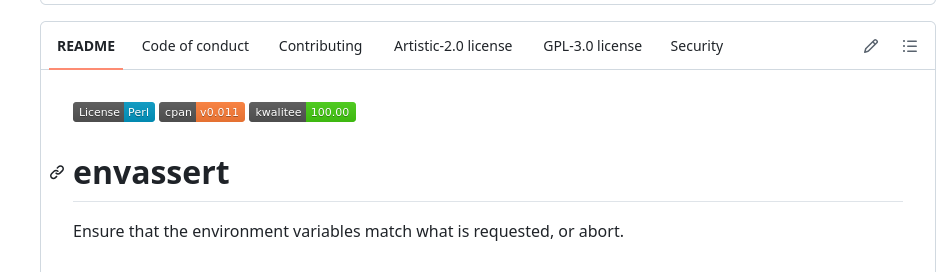
When a potential user first finds the project repository, the hosting site commonly presents him with the project README file. That makes README file in fact the welcome page to the project. Its purpose is changed from being purely informational to being an advertisement which competes for user’s attention with bright colors, animated pictures, videos and exciting diagrams, shapes and “bumper stickers”.

But under all the exciting cover it must also remain true to its nature: present the project as precisely as possible and stay up to date with its development.

README might also not be the only file which needs to be kept up to date because it is accessed in the (public) repository. Other potential files can include INSTALL, Changes and CODEOWNERS.

Many files therefore contain text which must be updated at least at the time of release: version numbers, API documentation, examples, file lists.

It is difficult to keep these files in sync with the code; just like documentation, which fact every programmer knows. The Dist::Zilla plugin Dist-Zilla-Plugin-WeaveFile will prevent the files from falling out of sync because their content is tested continuously.

There are other ways to do this, for instance Dist::Zilla::Plugin::CopyFilesFromBuild.

It is my philosophy that nothing in the repository is changed behind programmer’s back. It can also be dangerous to the programmer if he is not a frequent Git committer. Failed local tests are much safer. And when the test fails, it is easy to run dzil weave to update the files.

Dist-Zilla-Plugin-WeaveFile

The plugin Dist-Zilla-Plugin-WeaveFile works very much like my earlier plugin Dist-Zilla-Plugin-Software-Policies: it consists of three pieces: The Dist::Zilla command weave, the plugin WeaveFile which is used to define the configuration in dist.ini file, and the plugin Test::WeaveFile which creates tests for the distribution which check that the defined files exist and match their definition.

Example from dist.ini file:

; Uses default config file .weavefilerc
[WeaveFile / README.md]

; Uses a custom config file and specifies file explicitly
[WeaveFile]
config = install-weave.yaml
file = INSTALL

[Test::WeaveFile]

And the definition file .weavefilerc would then contain, for example:

---
snippets:
    badges: |
        [![CPAN](https://img.shields.io/cpan/v/My-Dist)](https://metacpan.org/dist/My-Dist)
    license: |
        # LICENSE
        [% USE date -%]

        This software is copyright (c) [% date.format(date.now, '%Y') %] by [% dist.author %].

        This is free software; you can redistribute it and/or modify it under
        the same terms as the Perl 5 programming language system itself.
files:
    "README.md": |
        [% snippets.badges %]

        # [% dist.name %] - [% dist.version %]

        [% dist.abstract %]

        [% pod("My::Module", "SYNOPSIS") %]
        [% pod("My::Module", "DESCRIPTION") %]

        [% pod("bin/myprog", "EXAMPLE") %]

        [% snippets.license %]

The templating system is Template-Toolkit. I am planning to change this so that user can choose another templating system if wanted, and then Template-Toolkit will be optional to install. Also allowing to change the output format (currently Markdown) is in plans. All pod text is converted to Markdown.

With a configuration like the above, when user runs dzil test, if the static files README.md and INSTALL are not in sync with their definitions, user can run:

dzil weave

or

dzil weave README.md
dzil weave INSTALL

Future

There might be additional generated information which we will be forced - for practical reasons - to commit into the repository. cpanfile could be one such. GitHub repositories are being scanned by different AI tools which could draw benefit from having such information at hand, instead of being generated and only available in the distribution in MetaCPAN. It does fight the principal of DRY, or, in this case “do not commit generated files” but it could be the lesser evil.

I have lately learned that Devin, the AI software engineer is being used to create summaries and presentations of GitHub repositories in DeepWiki. For an example of a Perl project, my Env-Assert.

plenv-where

A plenv plugin to show which Perl versions have a particular module.

I use plenv daily to manage the many Perl configurations which I use for different projects. Sometimes I have to install huge collections of Perl modules for some specific use case. And then I forget which Perl installation under plenv it was where I installed them.

So I wrote this plugin to fix that.

Example use cases:

$ plenv where Dist::Zilla
5.24.4
5.28.2
5.34.1-dzil
5.39.2

It can also report the actual path and/or the module version:

$ plenv where --path --module-version Dist::Zilla
/[..]versions/5.24.4/lib/perl5/site_perl/5.24.4/Dist/Zilla.pm 6.031
/[..]versions/5.28.2/lib/perl5/site_perl/5.28.2/Dist/Zilla.pm 6.032
/[..]versions/5.34.1-dzil/lib/perl5/site_perl/5.34.1/Dist/Zilla.pm 6.033
/[..]versions/5.39.2/lib/perl5/site_perl/5.39.2/Dist/Zilla.pm 6.030

Configuration

This plugin also uses a configuration file. plenv-where where reads a configuration from file ${XDG_CONFIG_HOME}/plenv/where, or, if the variable XDG_CONFIG_HOME does not exist, from file ${HOME}/.config/plenv/where. In the config file, we place every option on its own line.

Installation

The installation is manual.

mkdir -p "$(plenv root)/plugins"
git clone https://github.com/mikkoi/plenv-where.git "$(plenv root)/plugins/plenv-where"

GitHub and the Perl License

When we publish our Perl module repository on GitHub, we might notice something peculiar in the "About" section of our repository: GitHub doesn't recognize the Perl 5 license. This can be a bit confusing, especially when we've explicitly stated the licensing in our LICENSE file.

Without properly defined license, GitHub ranks the quality of a repository lower. This is also unfortunate because it limits the "searchability" of our repository. GitHub cannot index it according to the license and users cannot search by license. This is today more important than ever before as many enterprises rule out open source projects purely on the grounds that their license is poorly managed.

The Problem: Two Licenses in One File

The standard Perl 5 license, as used by many modules, is a dual license: Artistic License (2.0) and GNU General Public License (GPL) version 1 or later. Often, this is included in a single LICENSE file in the repository root.

GitHub's license detection mechanism, powered by Licensee, is designed to identify a single, clear license. When it encounters a file with two distinct licenses concatenated, it fails to make a definitive identification.

Here's an example of a repository where GitHub doesn't recognize the license. Notice the missing license badge in the "About" section:

github-licenses-not-visible.png

Also the "quick select" banner above Readme file does not acknowledge which license there is. github-licenses-not-visible-bottom-bar.png

The Solution: Separate License Files

The simplest and most effective solution is to provide each license in its own dedicated file. This allows Licensee to easily identify and display both licenses. This is perfectly valid because the Perl 5 license explicitly allows for distribution under either the Artistic License or the GPL. Providing both licenses separately simply makes it clearer which licenses apply and how they are presented.

(The other reason for having multiple licenses is situation where different parts of the repository are under different licenses. But this is not our problem here.)

For example, instead of a single LICENSE file containing both, we would have:

  • LICENSE-Artistic-2.0
  • LICENSE-GPL-3

Let's look at an example from my own env-assert repository. In this repository, I've separated the licenses into LICENSE-Artistic-2.0 and LICENSE-GPL-3.

And here's how GitHub's "About" section looks for env-assert, clearly recognizing both licenses:

github-licenses-visible.png

As we can see, GitHub now correctly identifies "Artistic-2.0" and "GPL-3.0" as the licenses for the project.

Same is also visible in the "quick select" bar:

github-licenses-visible-bottom-bar.png

Automating with Software::Policies and Dist::Zilla::Plugin::Software::Policies

Manually creating and maintaining these separate license files for every module can be tedious. Fortunately, there is a way to automate this process if you are using Dist::Zilla for authoring.

Dist::Zilla::Plugin::Software::Policies

If we're using Dist::Zilla for our module authoring, Dist-Zilla-Plugin-Software-Policies can automatically check that we have the correct License files. It uses Dist::Zilla's internal variable licence to determine the correct license files.

The Dist::Zilla plugin uses Software-Policies as a backend to do the heavy lifting.

Software::Policies

Software::Policies is a module that provides a framework for defining and enforcing software policies, including licensing. It comes with a pre-defined policy for Perl 5's double license. It can also generate other policy files, such as CONTRIBUTING.md, CODE_OF_CONDUCT.md, and SECURITY.md.

By using Software::Policies, we can programmatically check for the presence and content of our license files.

This approach not only solves the GitHub license detection problem but also helps us maintain consistent and correct licensing across all our Perl modules, integrating it directly into our build workflow.

By configuring this plugin in our dist.ini, we can ensure that our distribution always includes the correct and properly formatted license files, making GitHub (and other license scanners) happy.

Here's a simplified example of how we might configure it in our dist.ini:

[Software::Policies / License]
policy_attribute = perl_5_double_license = true

[Test::Software::Policies]
include_policy = License

This configuration tells Dist::Zilla plugin Test::Software::Policies to apply the Perl licensing policy, which typically means Artistic License 2.0 and GPL. When we build our distribution with Dist::Zilla, the plugin will create a test file checks for the existence and content of the LICENSE-Artistic-2.0 and LICENSE-GPL-3 files. During testing phase, when running dzil test or dzil release, the test files will be run and if the license files are missing or incorrect, the tests will fail.

To generate the files, we can run the command dzil policies License or just dzil policies. This will create the files according to config in dist.ini, the [Software::Policies / License] part of dist.ini.

We cannot create the files automatically during build because then they will only be included in the release, not in the repository. It is precisely in the repository that we need them for GitHub's sake. So the process to create or update the license files has to have this small manual stage.

plenv-libdirs

A plenv plugin to add additional include directories to Perl.

This plugin sets the contents of file .perl-libdirs. It hooks into plenv-exec command and every time you run perl or any other command under plenv, plenv-libdirs uses the .perl-libdirs files to set the PERL5LIB environment variable.

plenv-libdirs makes use of .perl-libdirs files in the current working directory and every directory between it and root. Environment variable PERL5LIB has a list of paths separated (like in PATH) by a colon on Unixish platforms and by a semicolon on Windows (the proper path separator being given by the command perl -V:path_sep). When plenv-libdirs collects the paths from .perl-libdirs files, the order of the paths follows the order of the directories. The longer the path to .perl-libdirs file, the higher precedence in PERL5LIB.

Like environment variable PATH, Perl uses the paths in PERL5LIB in the order they appear. Likewise, the search paths in perl-libdirs files appear in the same order. Example: three projects in dir root: project-a has a dependency on utils and its test files have a dependency on testing-utils. Together, when working directory in /root/project-a, these would result in: PERL5LIB=/root/testing-utils/lib:/root/utils/lib

root: projects
|- .perl-libdirs: **/root/utils/lib**
|- project-a
|  |- .perl-libdirs: **/root/testing-utils/lib**
|  |- lib
|  |- t
|
|- utils
|  |- lib
|
|- testing-utils
   |- lib

Usage

$ plenv libdirs ../other-project
$ plenv libdirs
../other-project/lib
$ plenv libdirs --add /tmp/second-project
$ plenv libdirs
../other-project/lib:/tmp/second-project
$ plenv libdirs --rm ../other-project
$ plenv libdirs
/tmp/second-project
$ perl -M5.020 -Mstrict -W -e 'say $INC[0];'
/tmp/second-project
$ plenv libdirs --unset
$ plenv libdirs

GitHub

Download from GitHub: https://github.com/mikkoi/plenv-libdirs/

Dot Your Environment

Env::Dot

In the category of “scratching my itch”.

Background

An app’s config is everything that is likely to vary between deploys (staging, production, developer environments, etc). The Twelve-Factor App

Storing the often changing parts of configuration in environment variables is one of the principles of The Twelve-Factor App.

From this principle follows the need to store those environment variables and their values in an easily accessible way. Hence, every developer maintains his or her own project specific .env files next to the project files in the same directory where they are used, for instance, when running locally or testing locally.

Yet Another Dotenv Solution

As if we didn’t have these enough already…

What is different with this one, except the name Env::Dot?

Flexibility in input

  • .env files come in two formats: Shell compatible and Docker combatible. Env::Dot supports both.
  • If no .env file is present, then do nothing.
  • If your .env file is located in another path, not the current working directory, you can use the environment variable DOTENV_FILEPATHS to tell where your dotenv file is located. You can specify several file paths; just separate them by :. Dot::Env will load all the files in the order you specify them.

Flexibility in output

  • Just use Env::Dot in your program and your %ENV will grow with the variables defined in .env file.
  • There is also a command line executable, envdot, to read the .env file and write out commands to create the environment variables.
  • Command envdot can write the env vars in sh (sh/Bash/Zsh), csh (C shell/tcsh) and fish (Fish) shell formats.
  • Command envdot will by default also export variables but you can prevent this if you don’t want the variables to be present in subshells and programs. This would make the variables only local to your current shell.

Existing Environment Takes Precedence

Existing environment variables always take precedence to dotenv variables!

A dotenv variable (variable from a file) does not overwrite an existing environment variable. This is by design because a dotenv file is to augment the environment, not to replace it.

This means that you can override a variable in .env file by creating its counterpart in the environment. For instance:

unset VAR
echo "VAR='Good value'" >> .env
perl -e 'use Env::Dot; print "VAR:$ENV{VAR}\n";'
# VAR:Good value
VAR='Better value'; export VAR
perl -e 'use Env::Dot; print "VAR:$ENV{VAR}\n";'
# VAR:Better value

DotEnv File Meta Commands

The file: commands affect all rows following its use.

The var: commands affect only the subsequent variable definition. If there is another envdot command, the second overwrites the first and default values are applied again.

file:type

Changes how Env::Dot reads lines below from this commands. Default is:

# envdot (file:type=shell)
VAR="value"

Other possible value of file:type is plain. Docker is using these kinds of .env files. Variable name is followed by = and value is the rest of the row before linefeed.

# envdot (file:type=plain)
VAR=My var value

var:allow_interpolate

By default, when writing variable definitions for the shell, every variable is treated as static and surrounded with single quotation marks (‘) in Unix shell which means shell will read the variable content as is. By setting this to 1 or true, you allow shell to interpolate. This meta command is only useful when running envdot command to create variable definitions for eval command to read.

# envdot (var:allow_interpolate)
DYNAMIC_VAR="$(pwd)/${ANOTHER_VAR}"

Usage

use Env::Dot;
print $ENV{'VAR_DEFINED_IN_DOTENV_FILE'};

envdot

envdot is a shell command which translates the dotenv files into shell commands. The file .env is of course the default input.

envdot
# VAR='Good value'; export VAR

It has the following parameters:

—export, —no-export

Write commands to set variables for local shell or for exporting them. You usually want to export the variables to all subsequent programs and subshells, i.e. make them into environment variables.

Default: export

-s, —shell

Which shell (family) are you using? Supported: sh, csh, fish.

-e, —dotenv

Path to .env file.

Default: current directory .env

Installation

If you need to use the envdot command in a restricted environment, such as a docker image build, there is a FatPacked executable ready. Usable when using CPAN is overkill.

curl -LSs -o envdot https://raw.githubusercontent.com/mikkoi/env-dot/master/envdot.self-contained
chmod +x ./envdot

Or you can do this in a Dockerfile:

RUN curl -LSs -o /usr/local/bin/envdot \
    https://raw.githubusercontent.com/mikkoi/env-dot/master/envdot.self-contained
RUN chmod +x /usr/local/bin/envdot

There is no extra dependencies outside Perl’s standard distribution, so envdot is as lean as it can be. And Perl, of course, is present in every more or less standard Linux distribution.